May 31, 2014
Compressing Teaching File Images With JPEG 2000
Compressing the image pixel data of cases in a Teaching File enables two important objectives: maximizing the use of storage space on the hard disk(s) of the server, and facilitating the transmission of image data across a network (including the Internet) between the server and workstations.
OsiriX has a JPEG 2000 library enabling the compression and decompression of images within the application itself. Note that JPEG 2000 is different from the ubiquitous JPEG image file format.
In this document I’ll provide guidance on using JPEG 2000-compressed images in a Teaching File.
Selecting the Appropriate Degree of Compression for a Teaching File
There are basically two forms of compression: lossless and lossy. The former permits the reconstruction of the original data from the compressed data set; lossy compression results in some irreversible data loss which, depending the degree of compression, need not result in an appreciable diminution of overall digital image quality, whether for clinical diagnostic or teaching purposes.
Because one would like cases to be as small as possible (typically measured as kilo- or megabytes in size; KB or MB), a relevant question is how much lossy compression one can use without an unacceptable degradation of image quality.
Fortunately, research has been done that addresses this question. One relevant guidance statement concerning the use of lossy compression in clinical practice is from the Canadian Association of Radiologists, a summary of which, for our purposes may be stated as follows:
Computed and Digital Radiography: DICOM JPEG-2000 to a maximum compression ratio of 30:1
Computed Tomography, for images less than 5mm section thickness: DICOM JPEG-2000 to a maximum compression ratio of 12:1
A Comparison of Compressed Images
Chest radiography
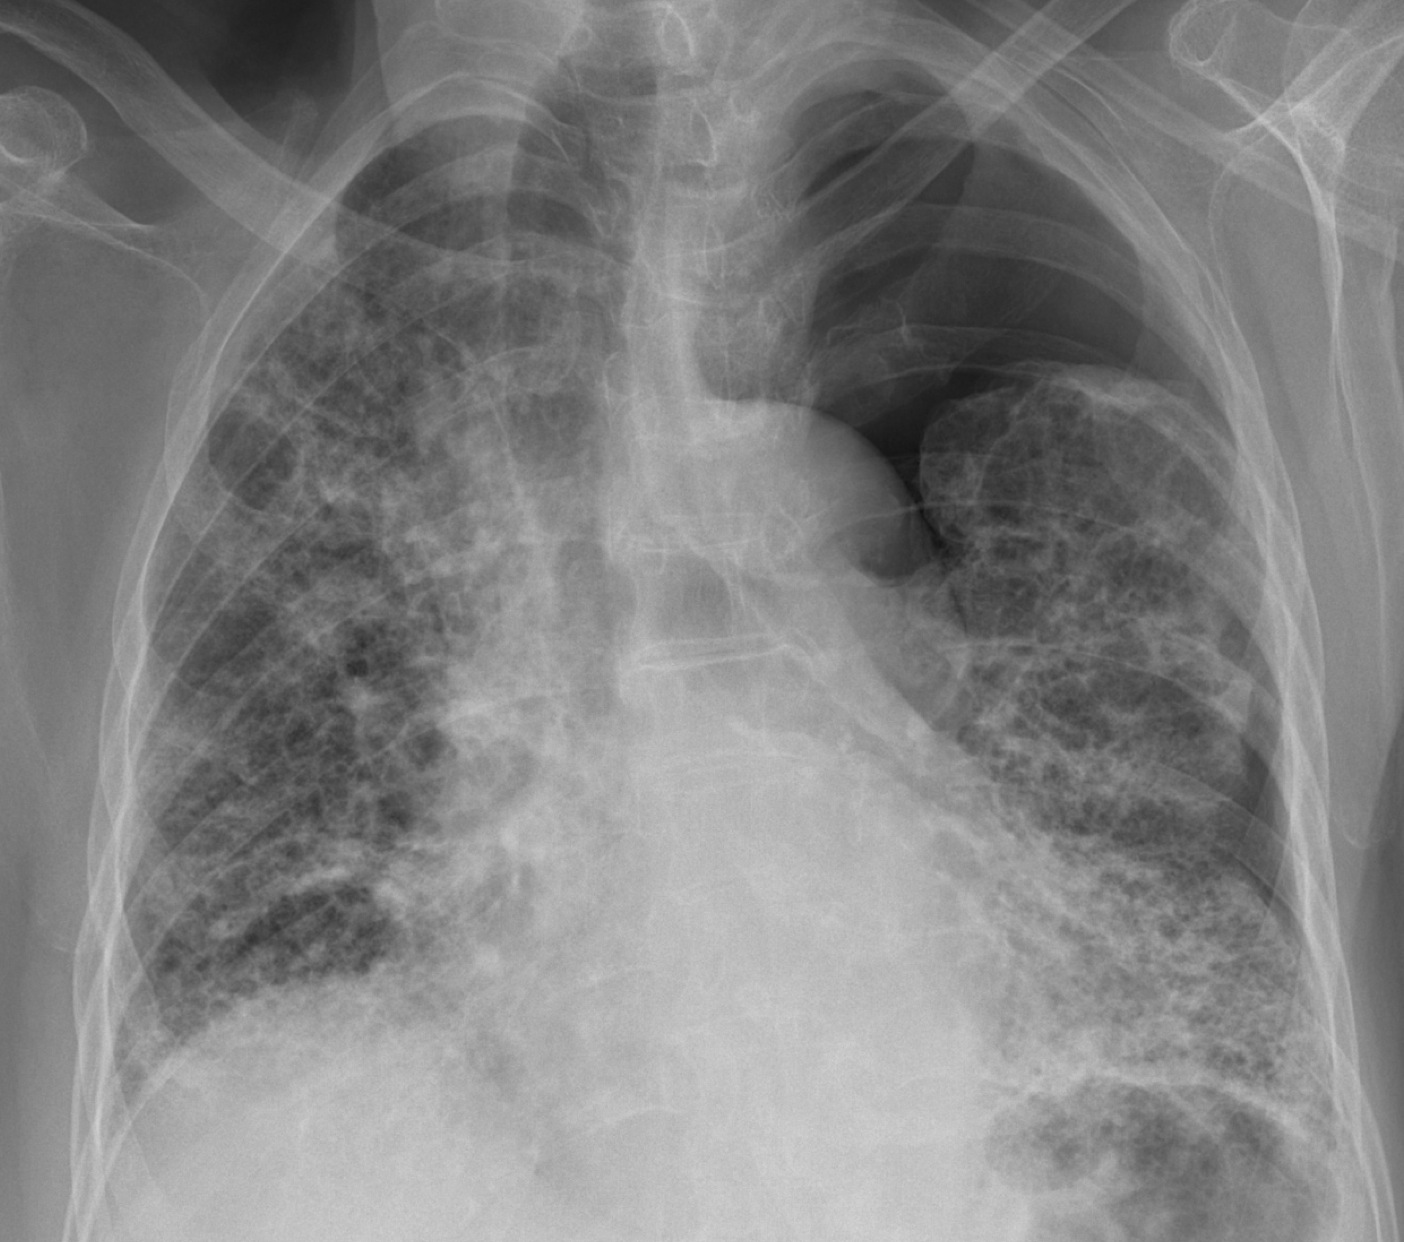
Chest Radiograph with Lossless Compression Compression ratio of 3.4:1
3.5 MB
Chest radiography
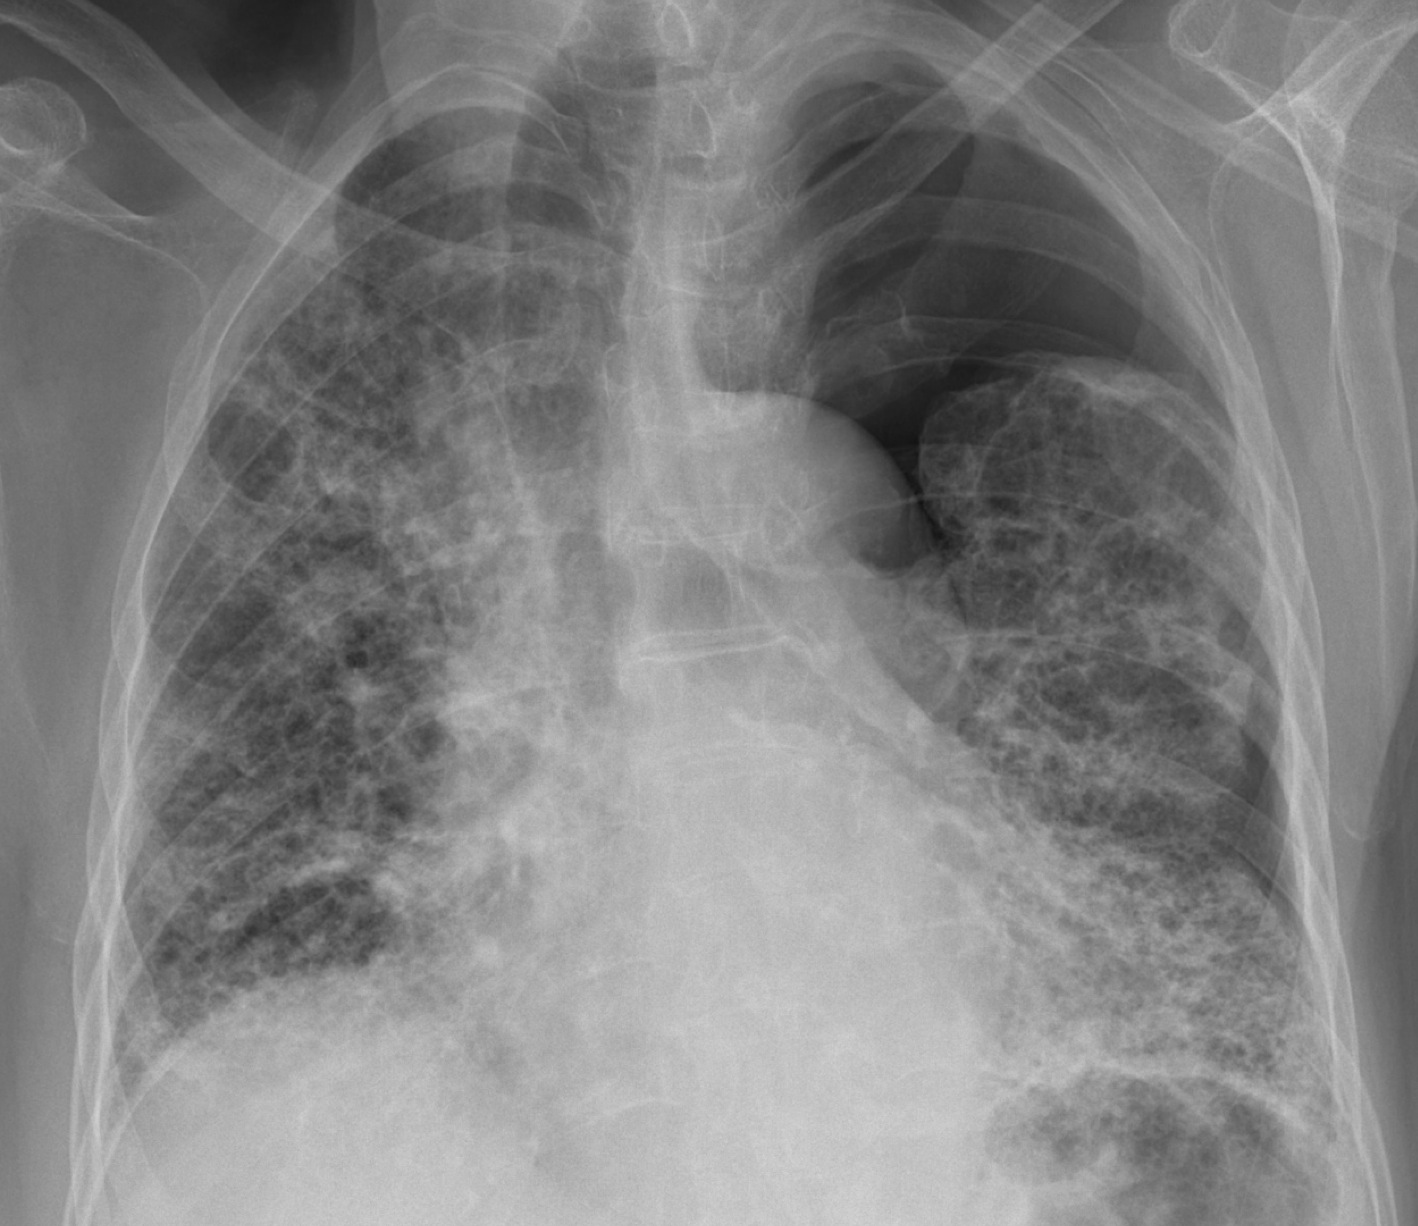
Chest Radiograph with Lossy Compression Compression ratio of 20:1
602 KB
Chest Computed Tomography
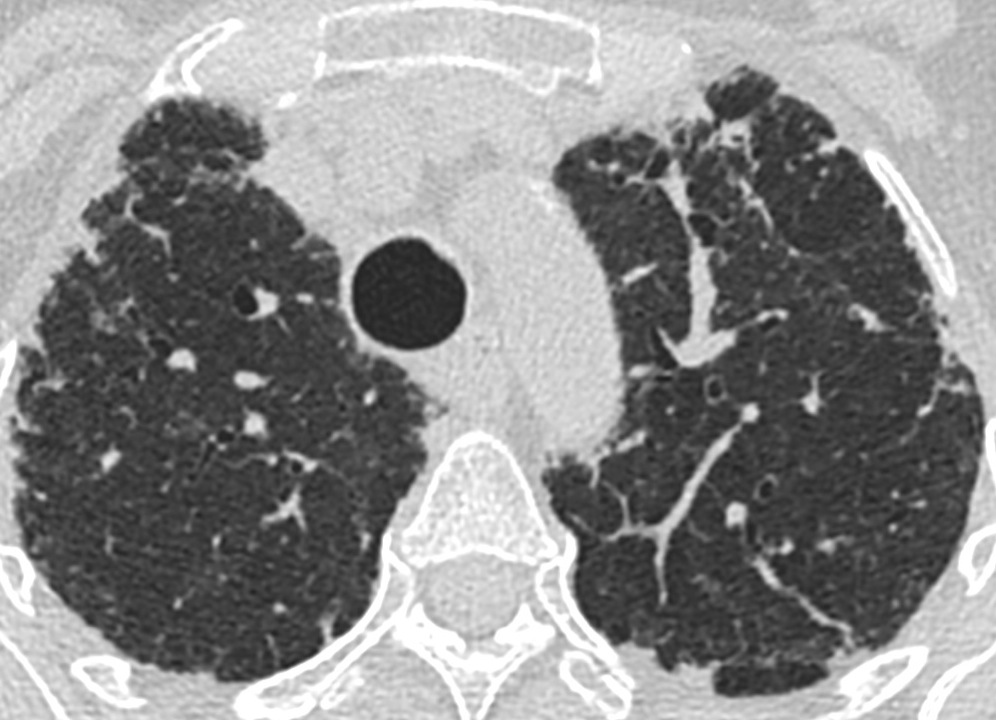
Chest CT, 1mm section thickness, with Lossless Compression
Compression ratio of 2.2:1
246KB
Chest Computed Tomography
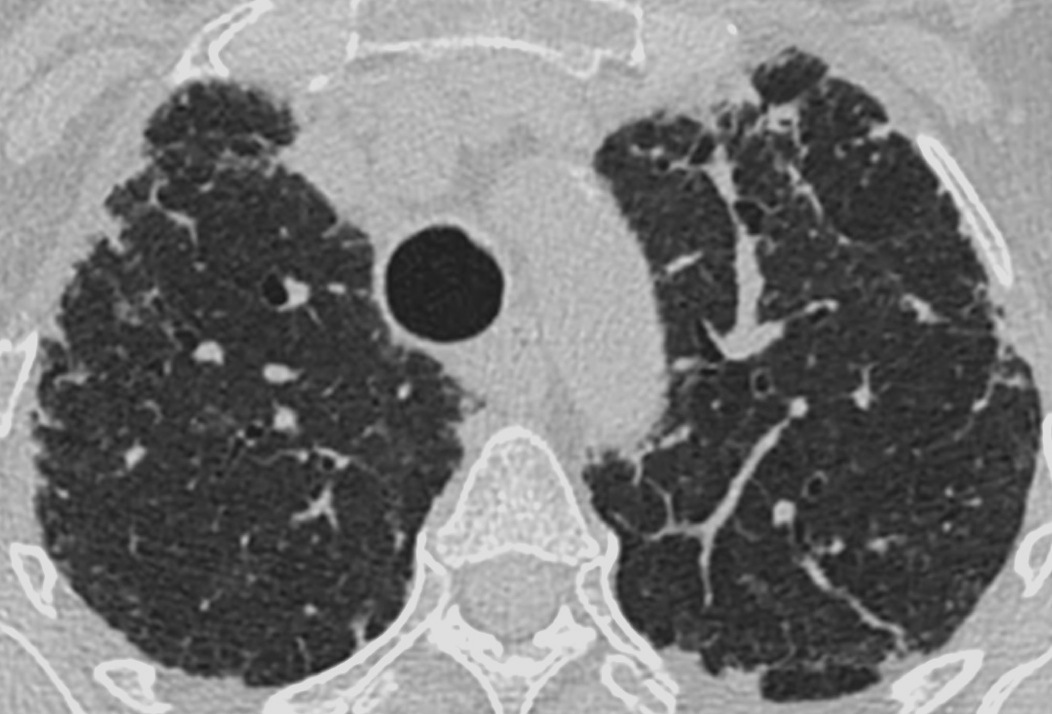
Chest CT, 1mm section thickness, with Lossy Compression
Compression ratio of 6:1
78KB
The lossy compression ratios above correspond to JPEG-2000 compression with a so-called Quality Factor of 2, or Medium Quality, in OsiriX.
In reviewing these images, these Lossy Compression Ratios are fine for our purpose.
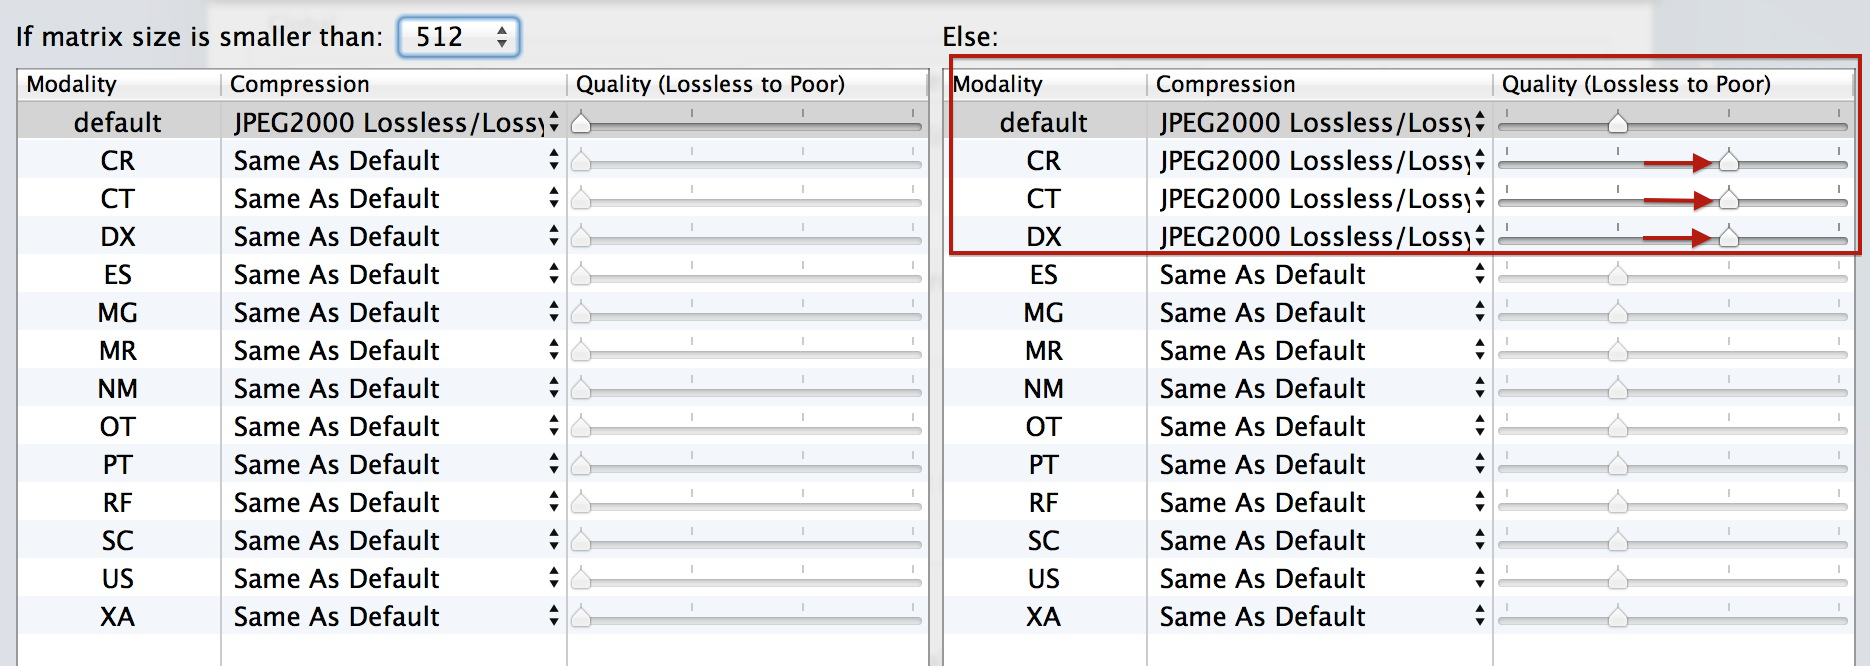
Specifying Compression Ratios in OsiriX
This is done in OsiriX Preferences: General: Compression levels: Configure. I suggest the following settings:
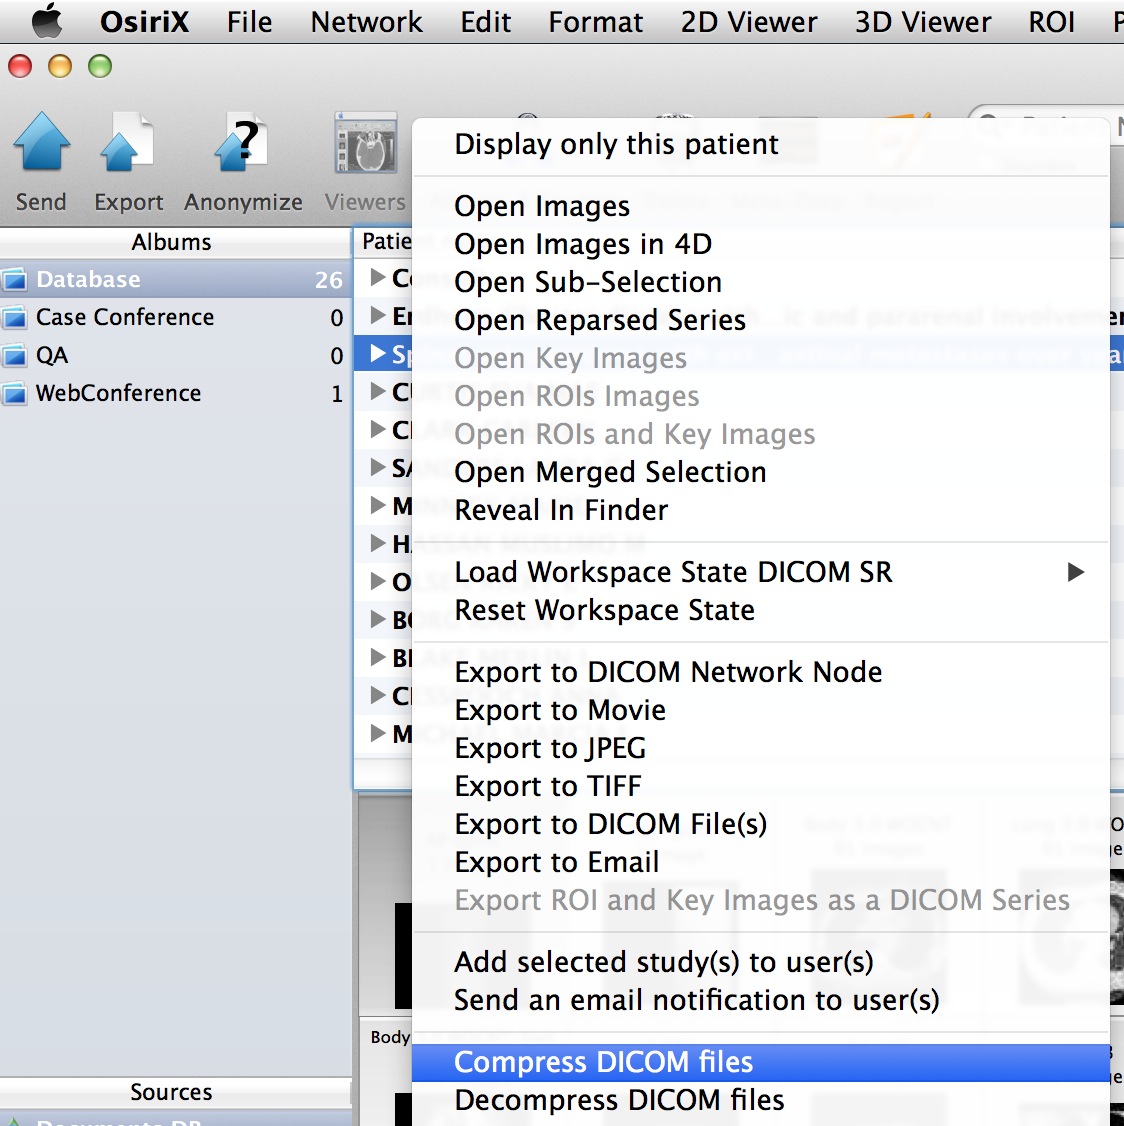
Now you can compress a case by right-clicking on it, and choosing the Compression menu item
I always compress a case using my Laptop OsiriX before sending it on to my Server. If you have a setup wherein others may be sending non-compressed cases to your Server, make sure that the relevant setting in OsiriX Preferences: Listener for Incoming Files is set to Compress non-compressed images with JPEG
Identifying JPEG 2000-compressed images in OsiriX
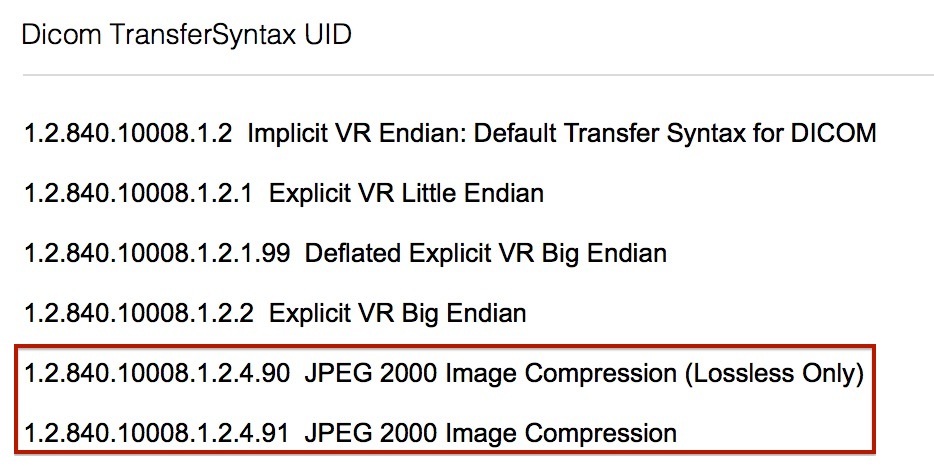
Transfer of DICOM data between devices involves the notion of a Transfer Syntax, which may be summarized as follows:
One can check the applicable Transfer Syntax and the current compression state in the meta-data, as follows:
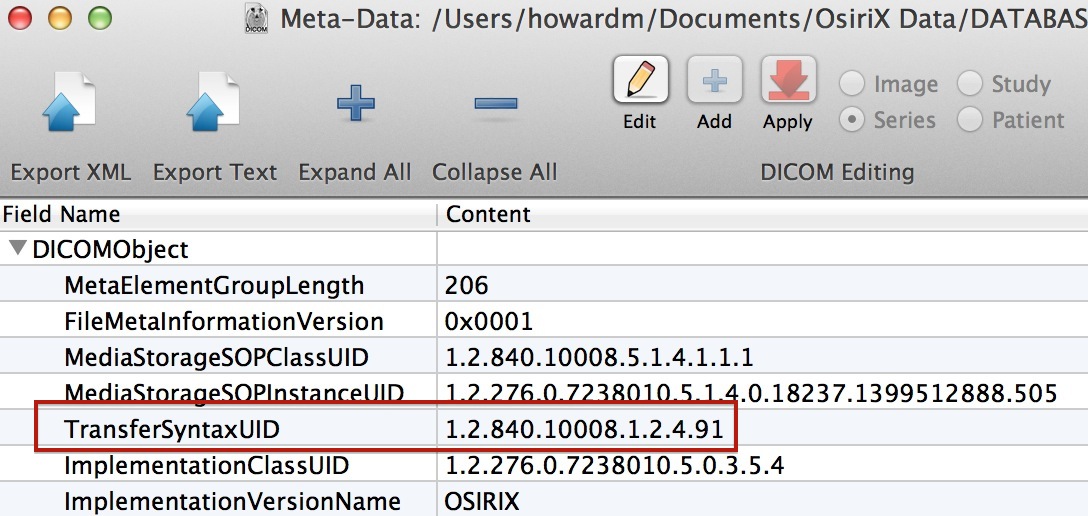

Inspection of the meta-data of this case confirms the presence of JPEG 2000 compression, to a Quality Factor of 2. If the image data had previously been compressed, that history is present in the square brackets, visible in the graphic above. In general, it’s best not to decompress/compress data multiple times to avoid the introduction of artifacts in the image.
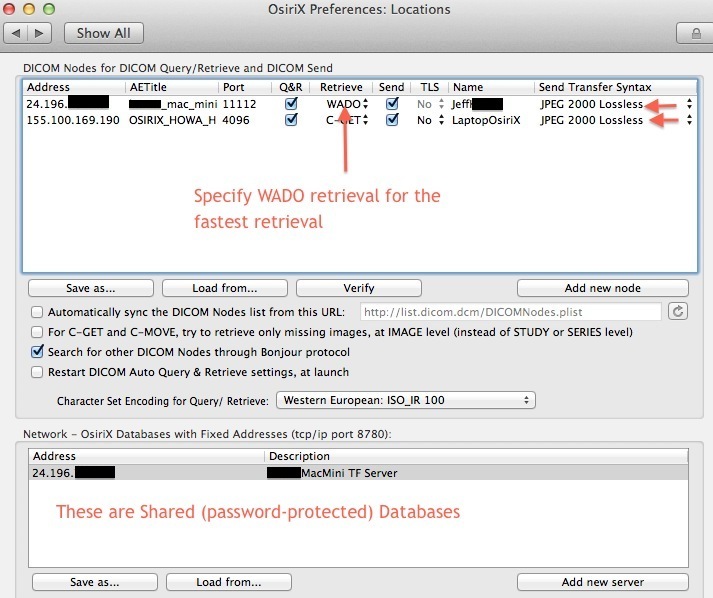
Maintaining Compressed Images on the Server
At present, if a person, performing a Query/Retrieve action on an OsiriX database, requests retrieval via a non-JPEG 2000 Transfer Syntax, the images will first be decompressed on the server before the images are sent, and will remain on the Server in that state, definitely undesirable. (An option to change this default action may be provided in a future version of OsiriX.)
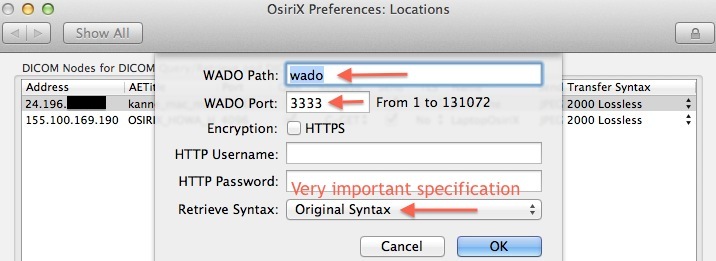
To avoid this, make sure that the retrieving workstation has the following WADO Retrieve settings in OsiriX’s Preferences: Locations
Now you have a setup that facilitates the rapid transfer of cases across the network and best uses disk space.