Mar 01, 2014
Using OsiriX To Present Cases At A Conference
(Updated November 22nd, 2014)
Using OsiriX is a great way to show cases in the context of any presentation, including a Web-based videoconference. This guide will provide technical guidance and tips for an effective presentation. I will cover the following areas:
- Preparing the Local Database for the conference.
- Suggestions for which functions to place in the Toolbar of the 2-D Viewer window.
- Ways of efficiently showing imaging series during the presentation.
- Keyboard commands and shortcuts that are very useful during a presentation
If you’re not yet familiar with getting and anonymizing cases, and importing them into OsiriX, first review guidance for these tasks in other documents on this website.
Preparing the Local Database
Create an Web Conference album into which you drag the cases you’re going to show. When the conference is over, you can delete them from the album by selecting them in the database, clicking delete, and choosing Remove from current album.
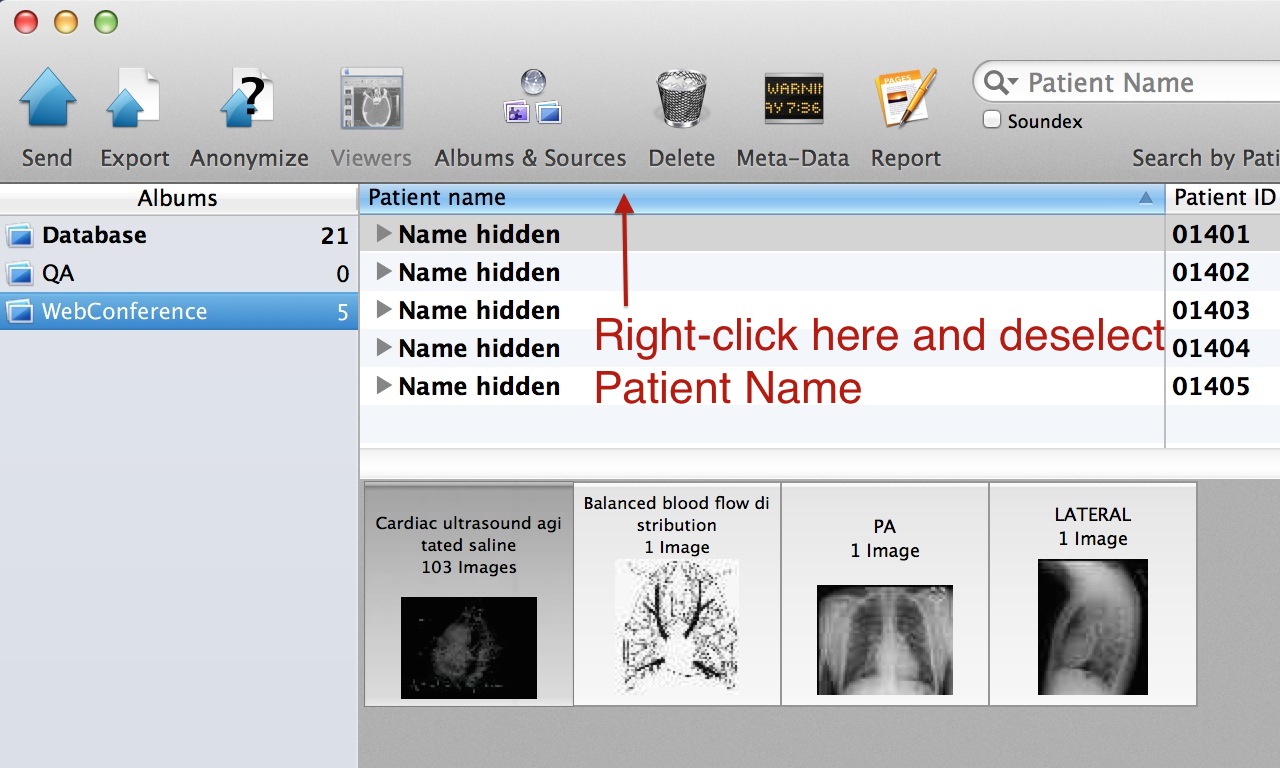
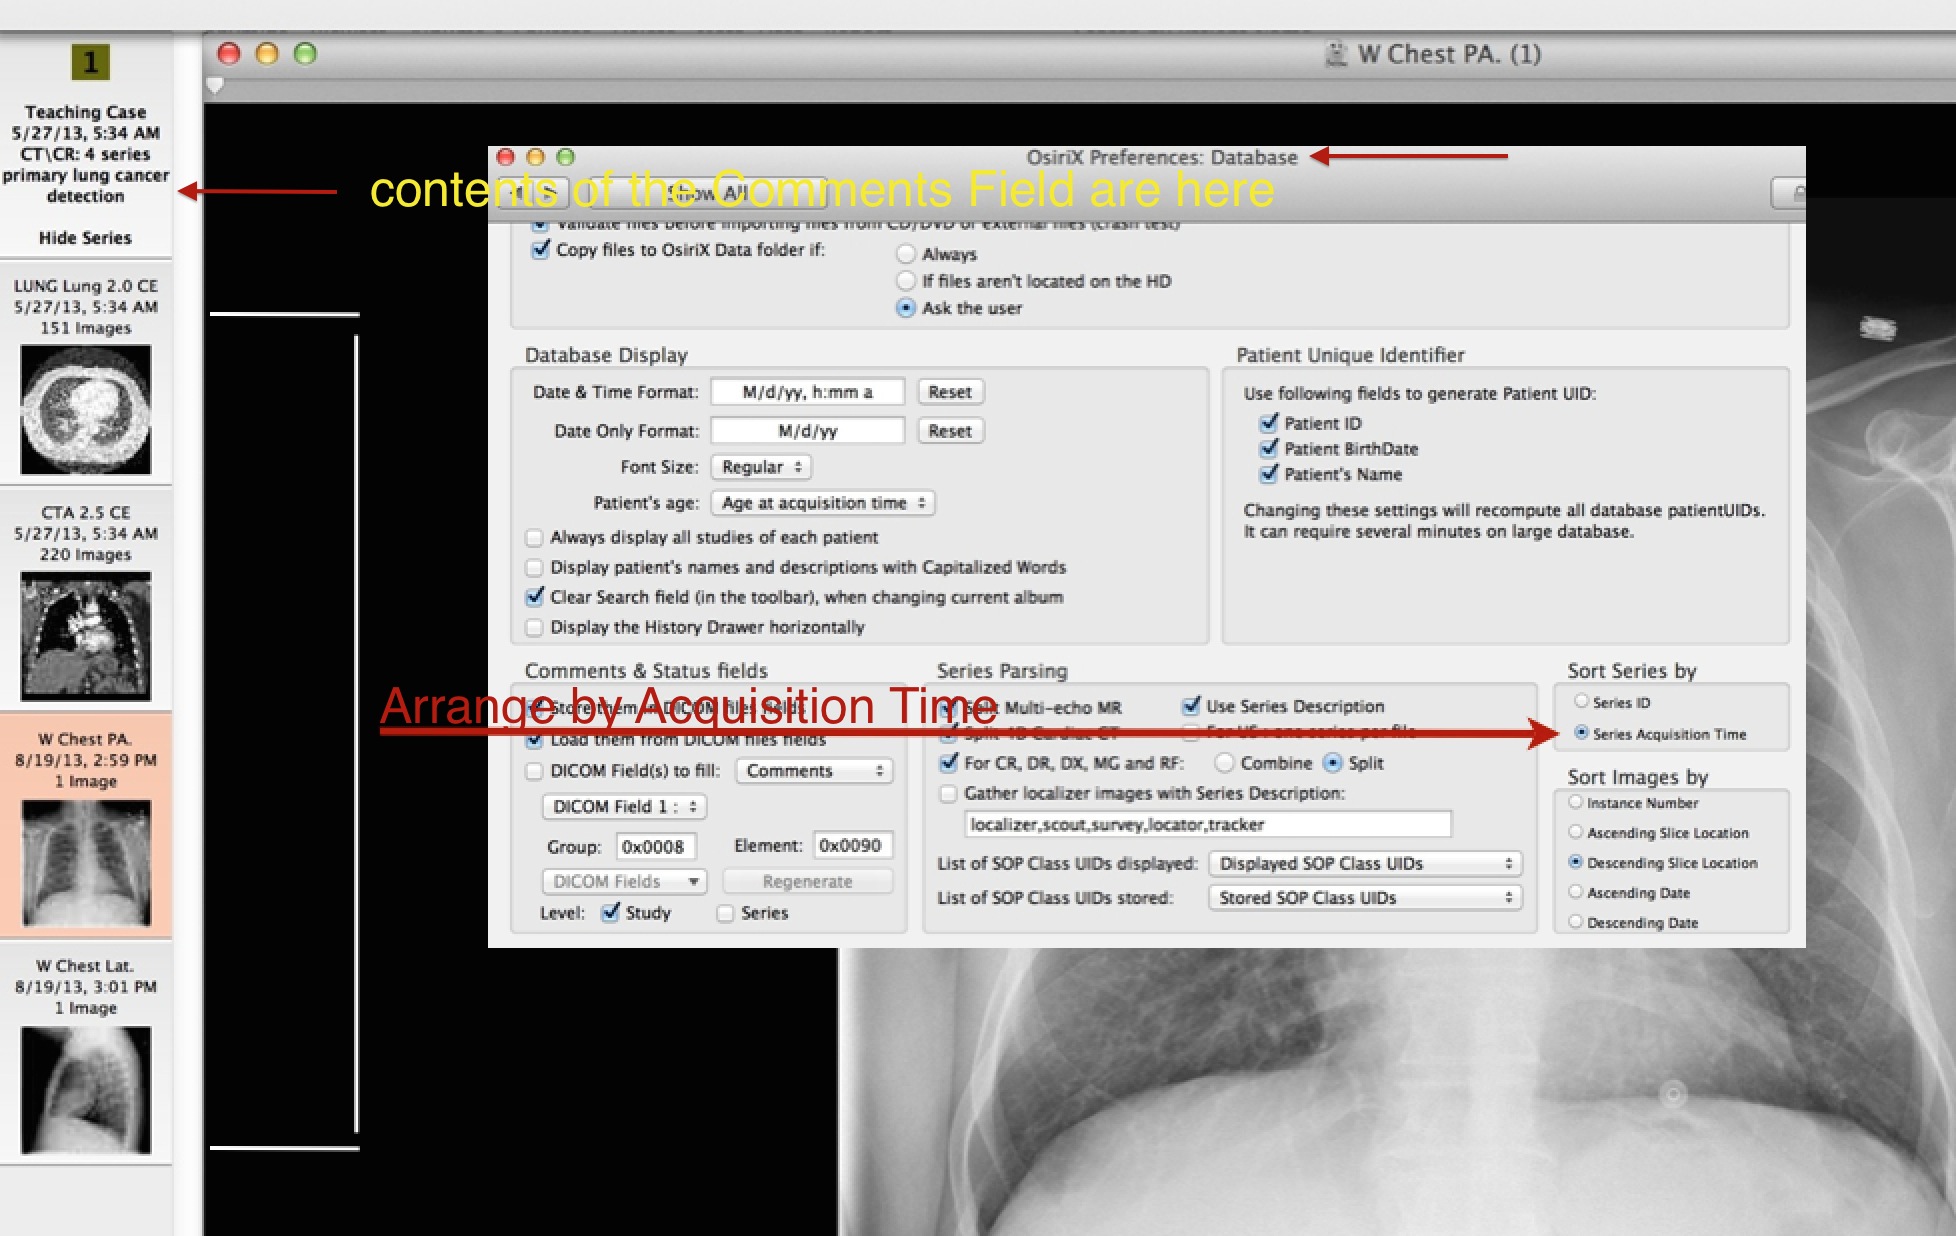
For the purpose of a conference, there is no need to have more than the following in the Database Window: Diagnosis (Patient Name); Age (You can replace the patient’s date of birth during anonymization with the following format: Year of Birth0101); Some comments to remind you of the case (optional).
This graphic demonstrates this process

Now you can close the Sidebar by clicking on the Albums & Sources icon

If you want to show the cases as unknowns, deselect Patient Name and the diagnosis will be replaced with Name hidden.
Functions to place in the Toolbar for use during the presentation
In the 2D Viewer window, right-click on the Toolbar and choose Customize Toolbar... Then drag the items outlined in Red to the Toolbar if they are not already there. You will use these as indicated during your presentation.
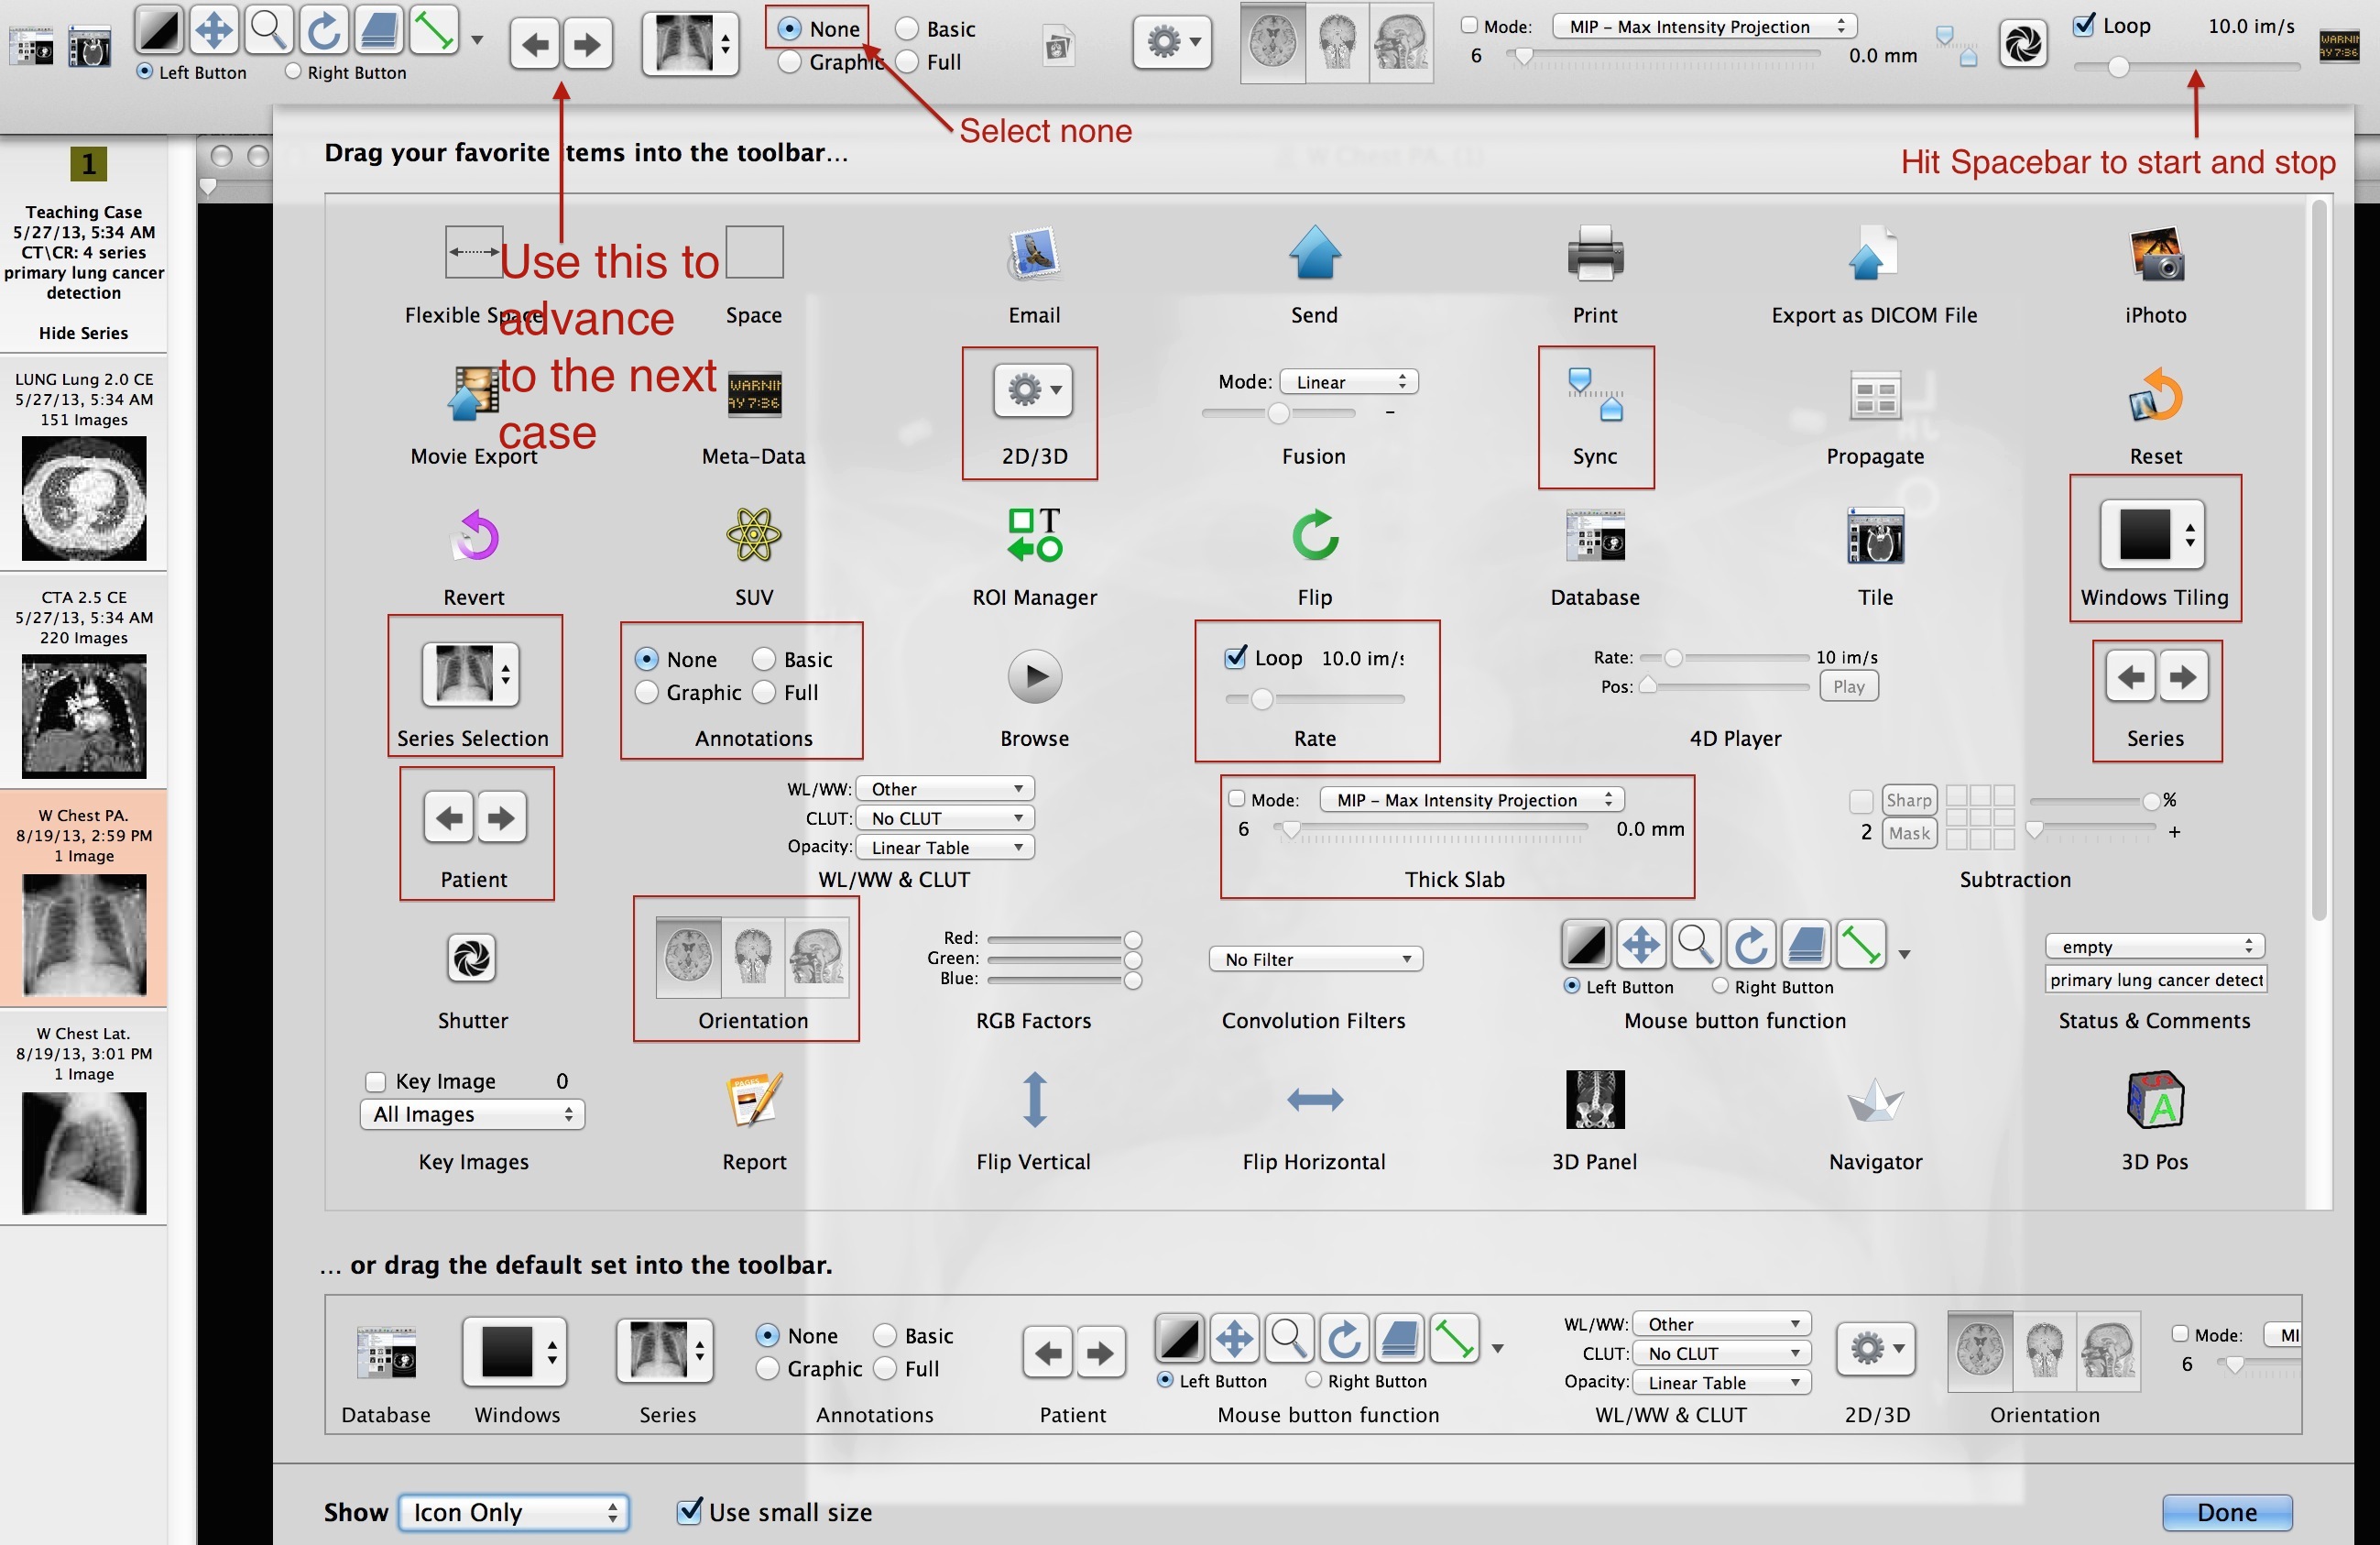
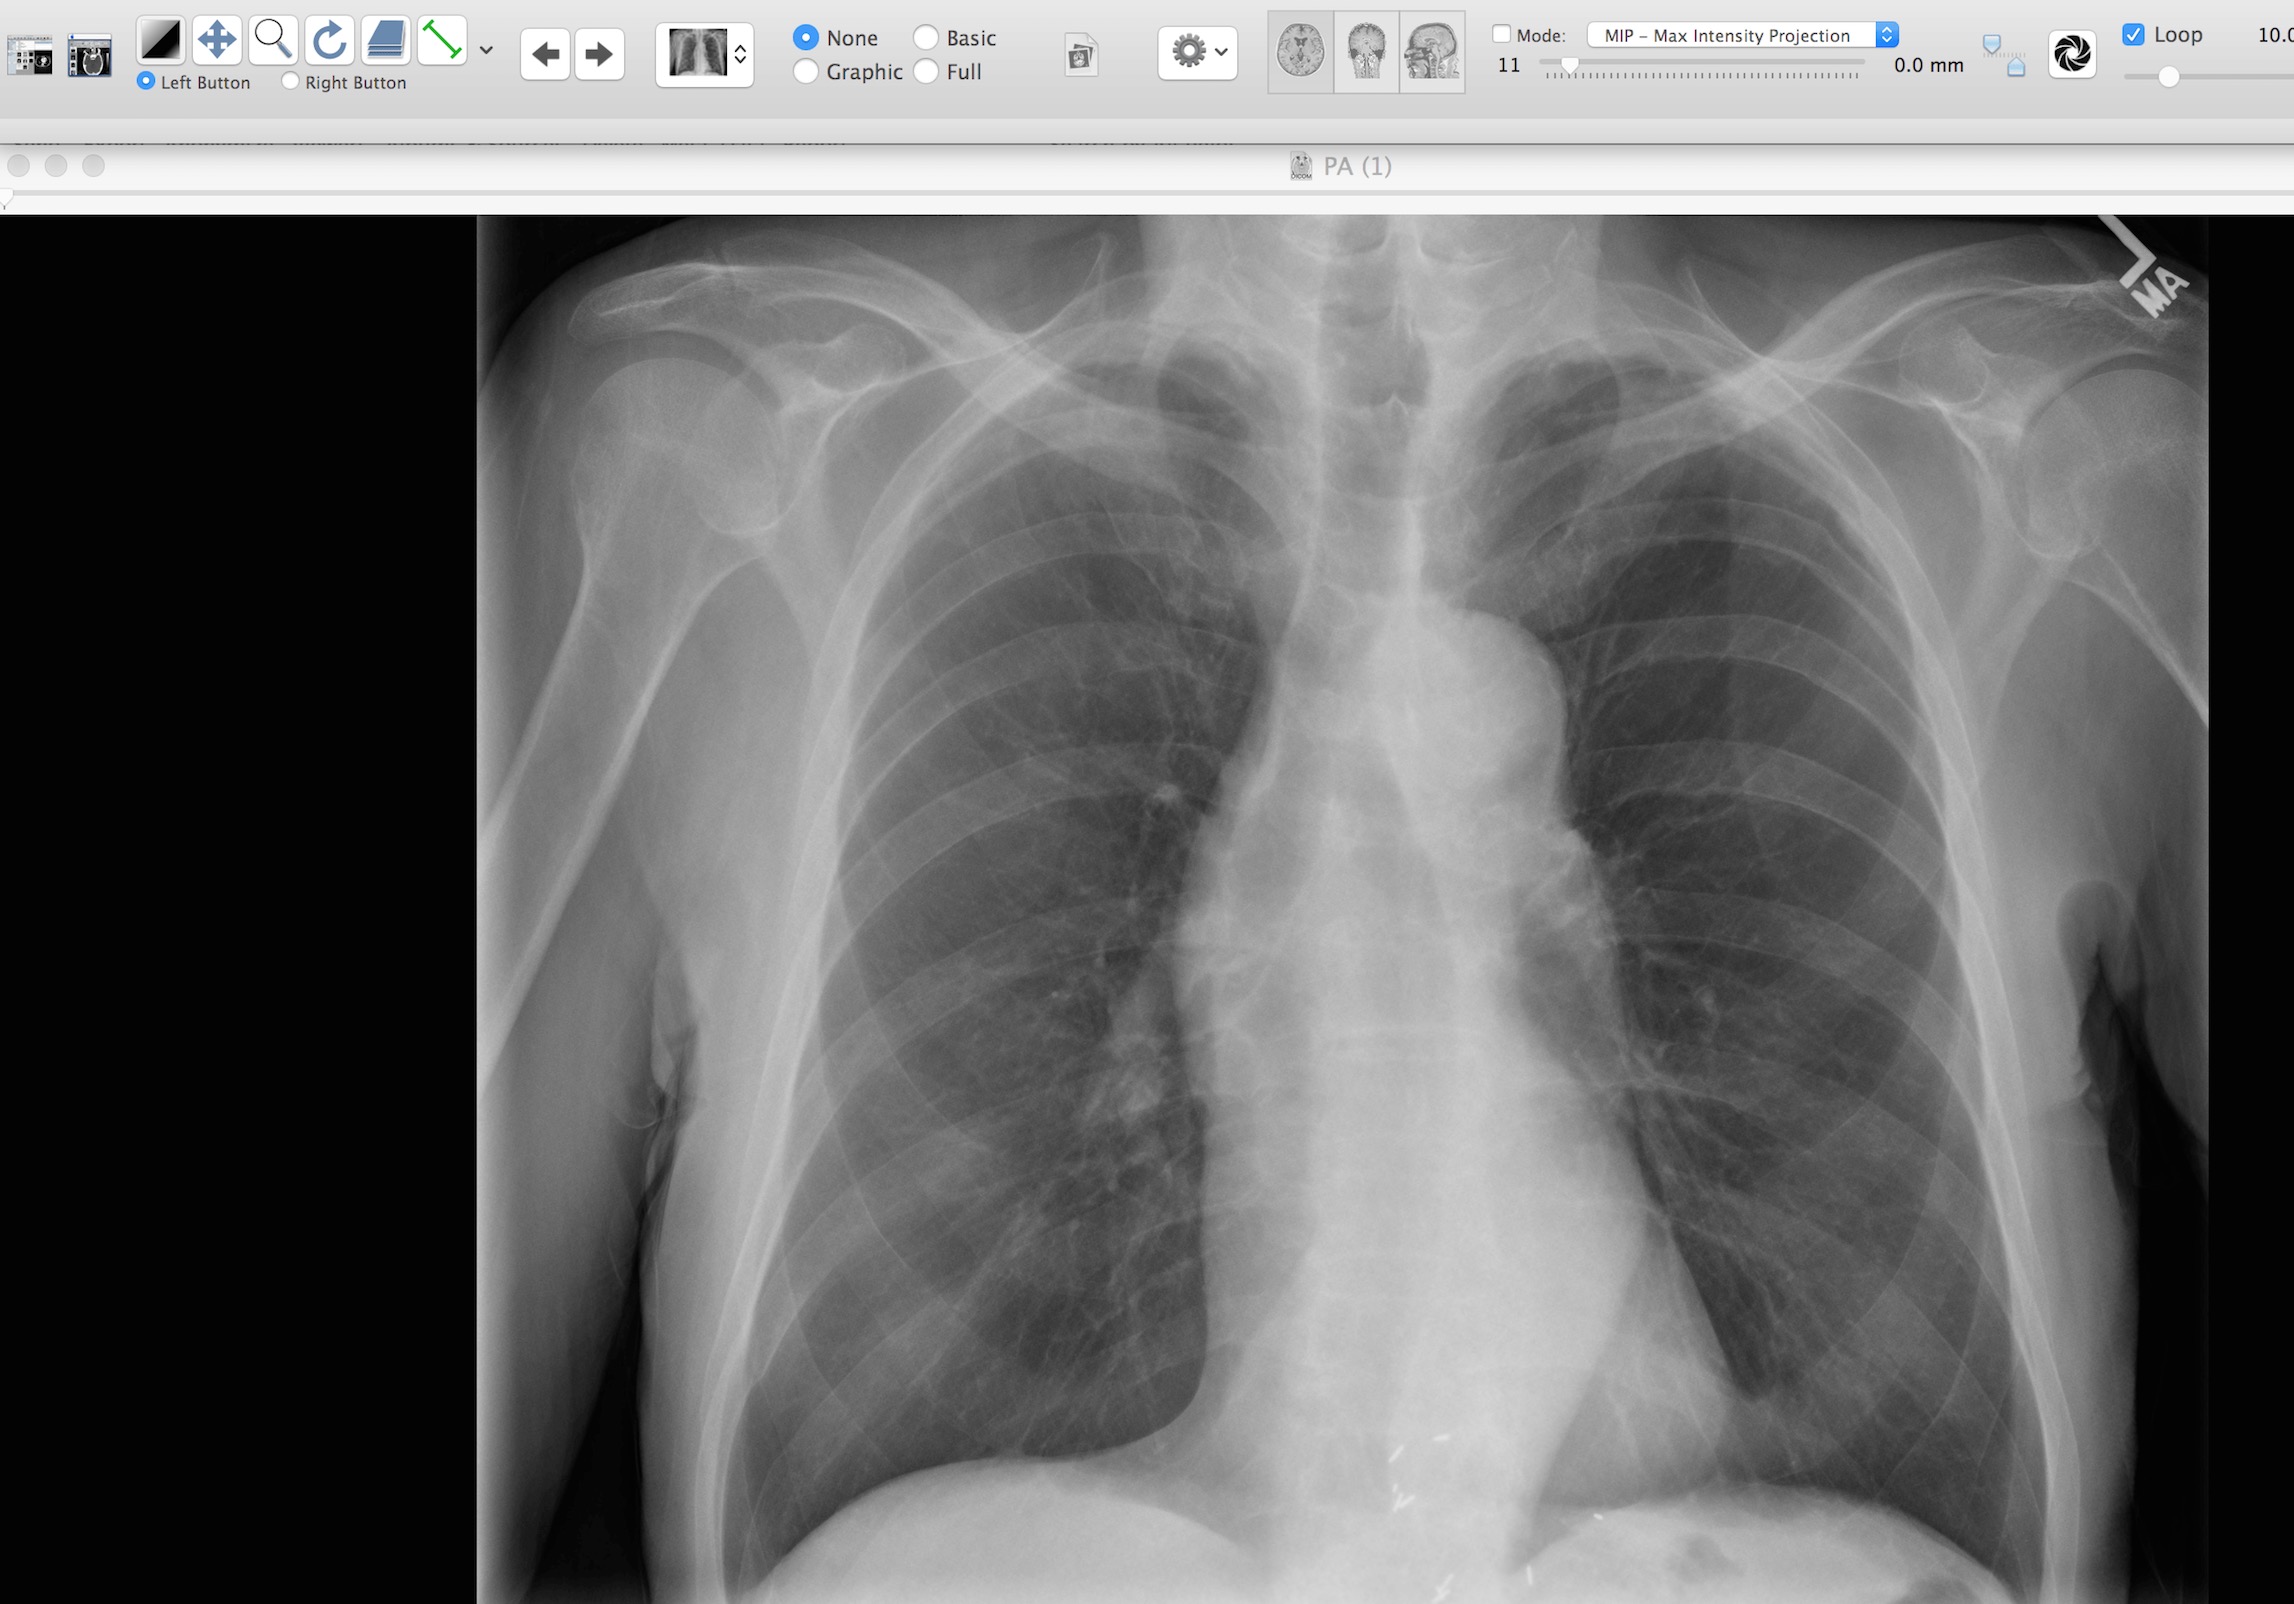
Turn off the display of any annotations by choosing None. You can use the Patient icon to advance through your cases without having to go back to the Database Window. As shown in a graphic below, look at the top of the Sidebar for text to remind yourself which case you’re about to show.
If you’re showing a Series in video (cine) mode, you can use the Loop item, after setting an appropriate rate (images/sec).
Use the other functions as you deem helpful.
Tip: if you have a pertinent thin section Series, put it in the database. You can then use the relevant tool to show a thicker slab (Mean Mode, to diminish image noise) and in different (coronal and sagittal) planes. Of course, you can use the 3D MPR tool as well.
Showing the 2D Viewer Window on a separate display
If you’re able to connect your device, such as a laptop, to a second display or conference room projector, I suggest you configure your setup to display the 2D Viewer Window separately. That way, you can switch back and forth from your Database Window, and audience members will not see it. When you go back to the Database Window, they will see an empty desktop until you show the next case.
This is great for showing cases to Trainees in educational or examination settings.
In order to do this, stipulate the following options in Preferences: Viewers:
Note: If you participate in a GoToMeeting Webinar, and use this method, stipulate the *Second Screen* option in its Control Panel.
Here is a very useful Apple keyboard-combination shortcut for switching between the Mirror Mode (which you do not want in this situation) and displaying the 2D Viewer Window on the second display:
Command-F1 (not Command-1)
Otherwise, you can stipulate this manually in System Preferences: Displays.
Showing different series in the 2D Viewer Window
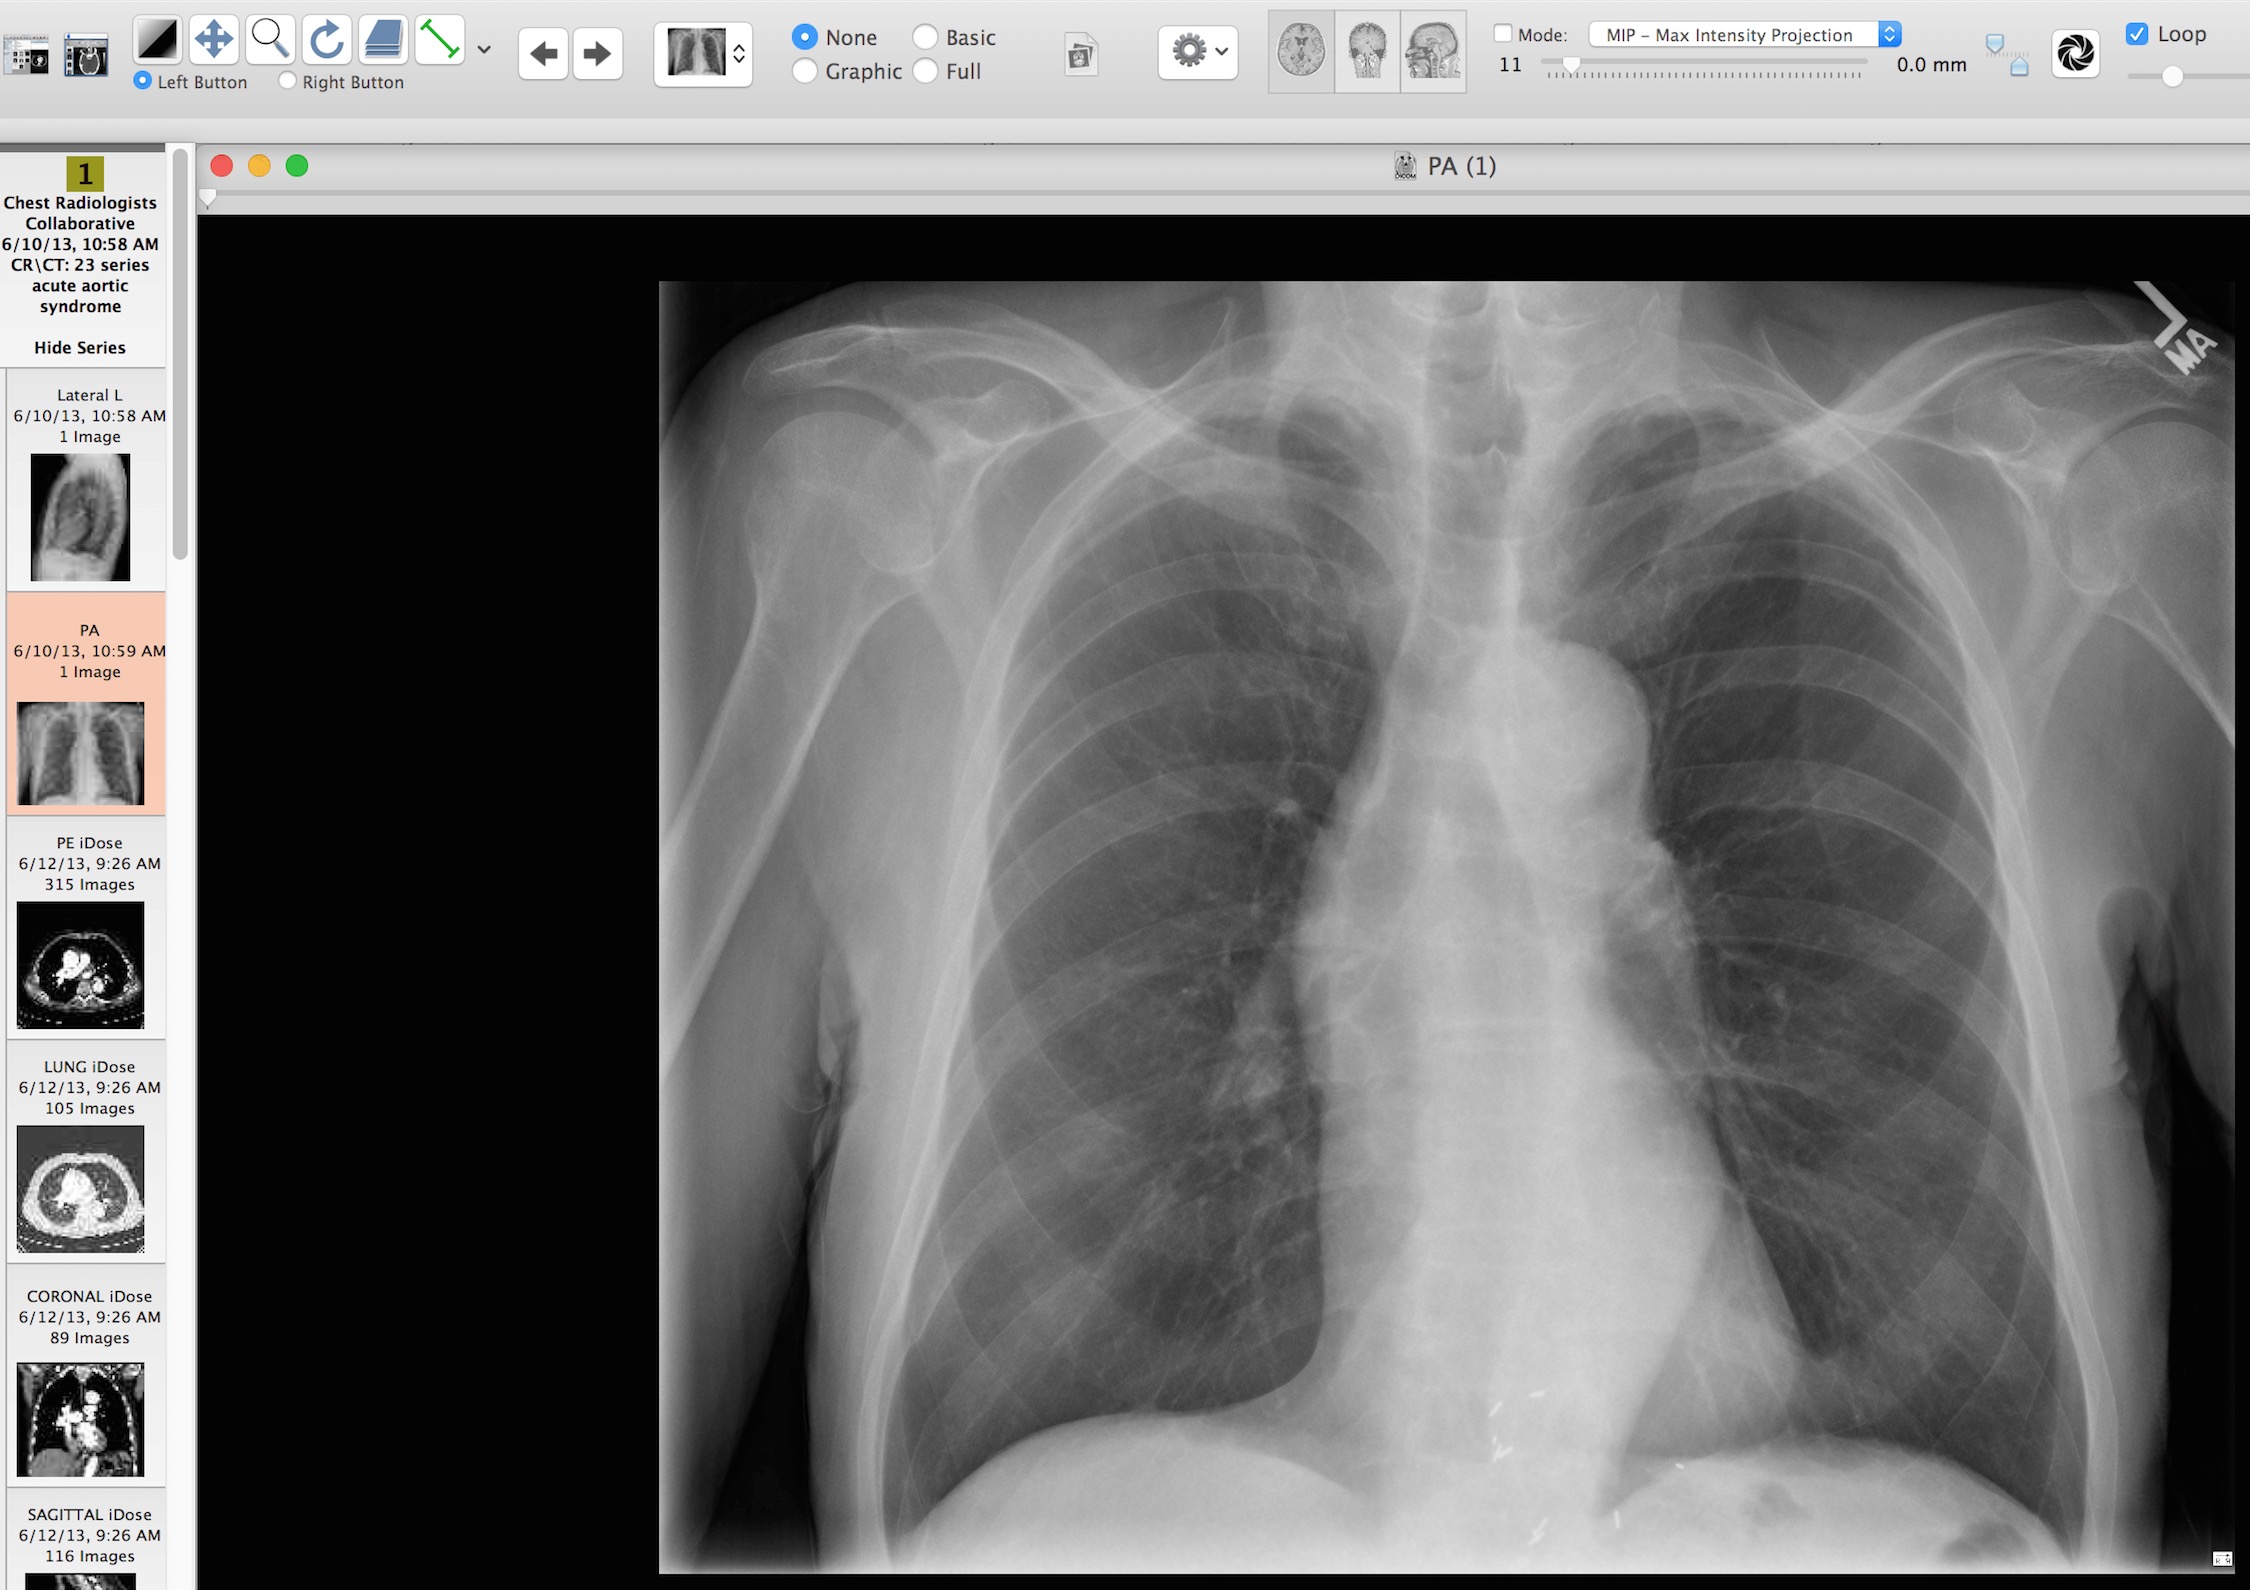
You will see all the Series in the Sidebar. I suggest your arrange them in chronological (acquisition time) order by specifying this in OsiriX Preferences: Database as shown in this graphic
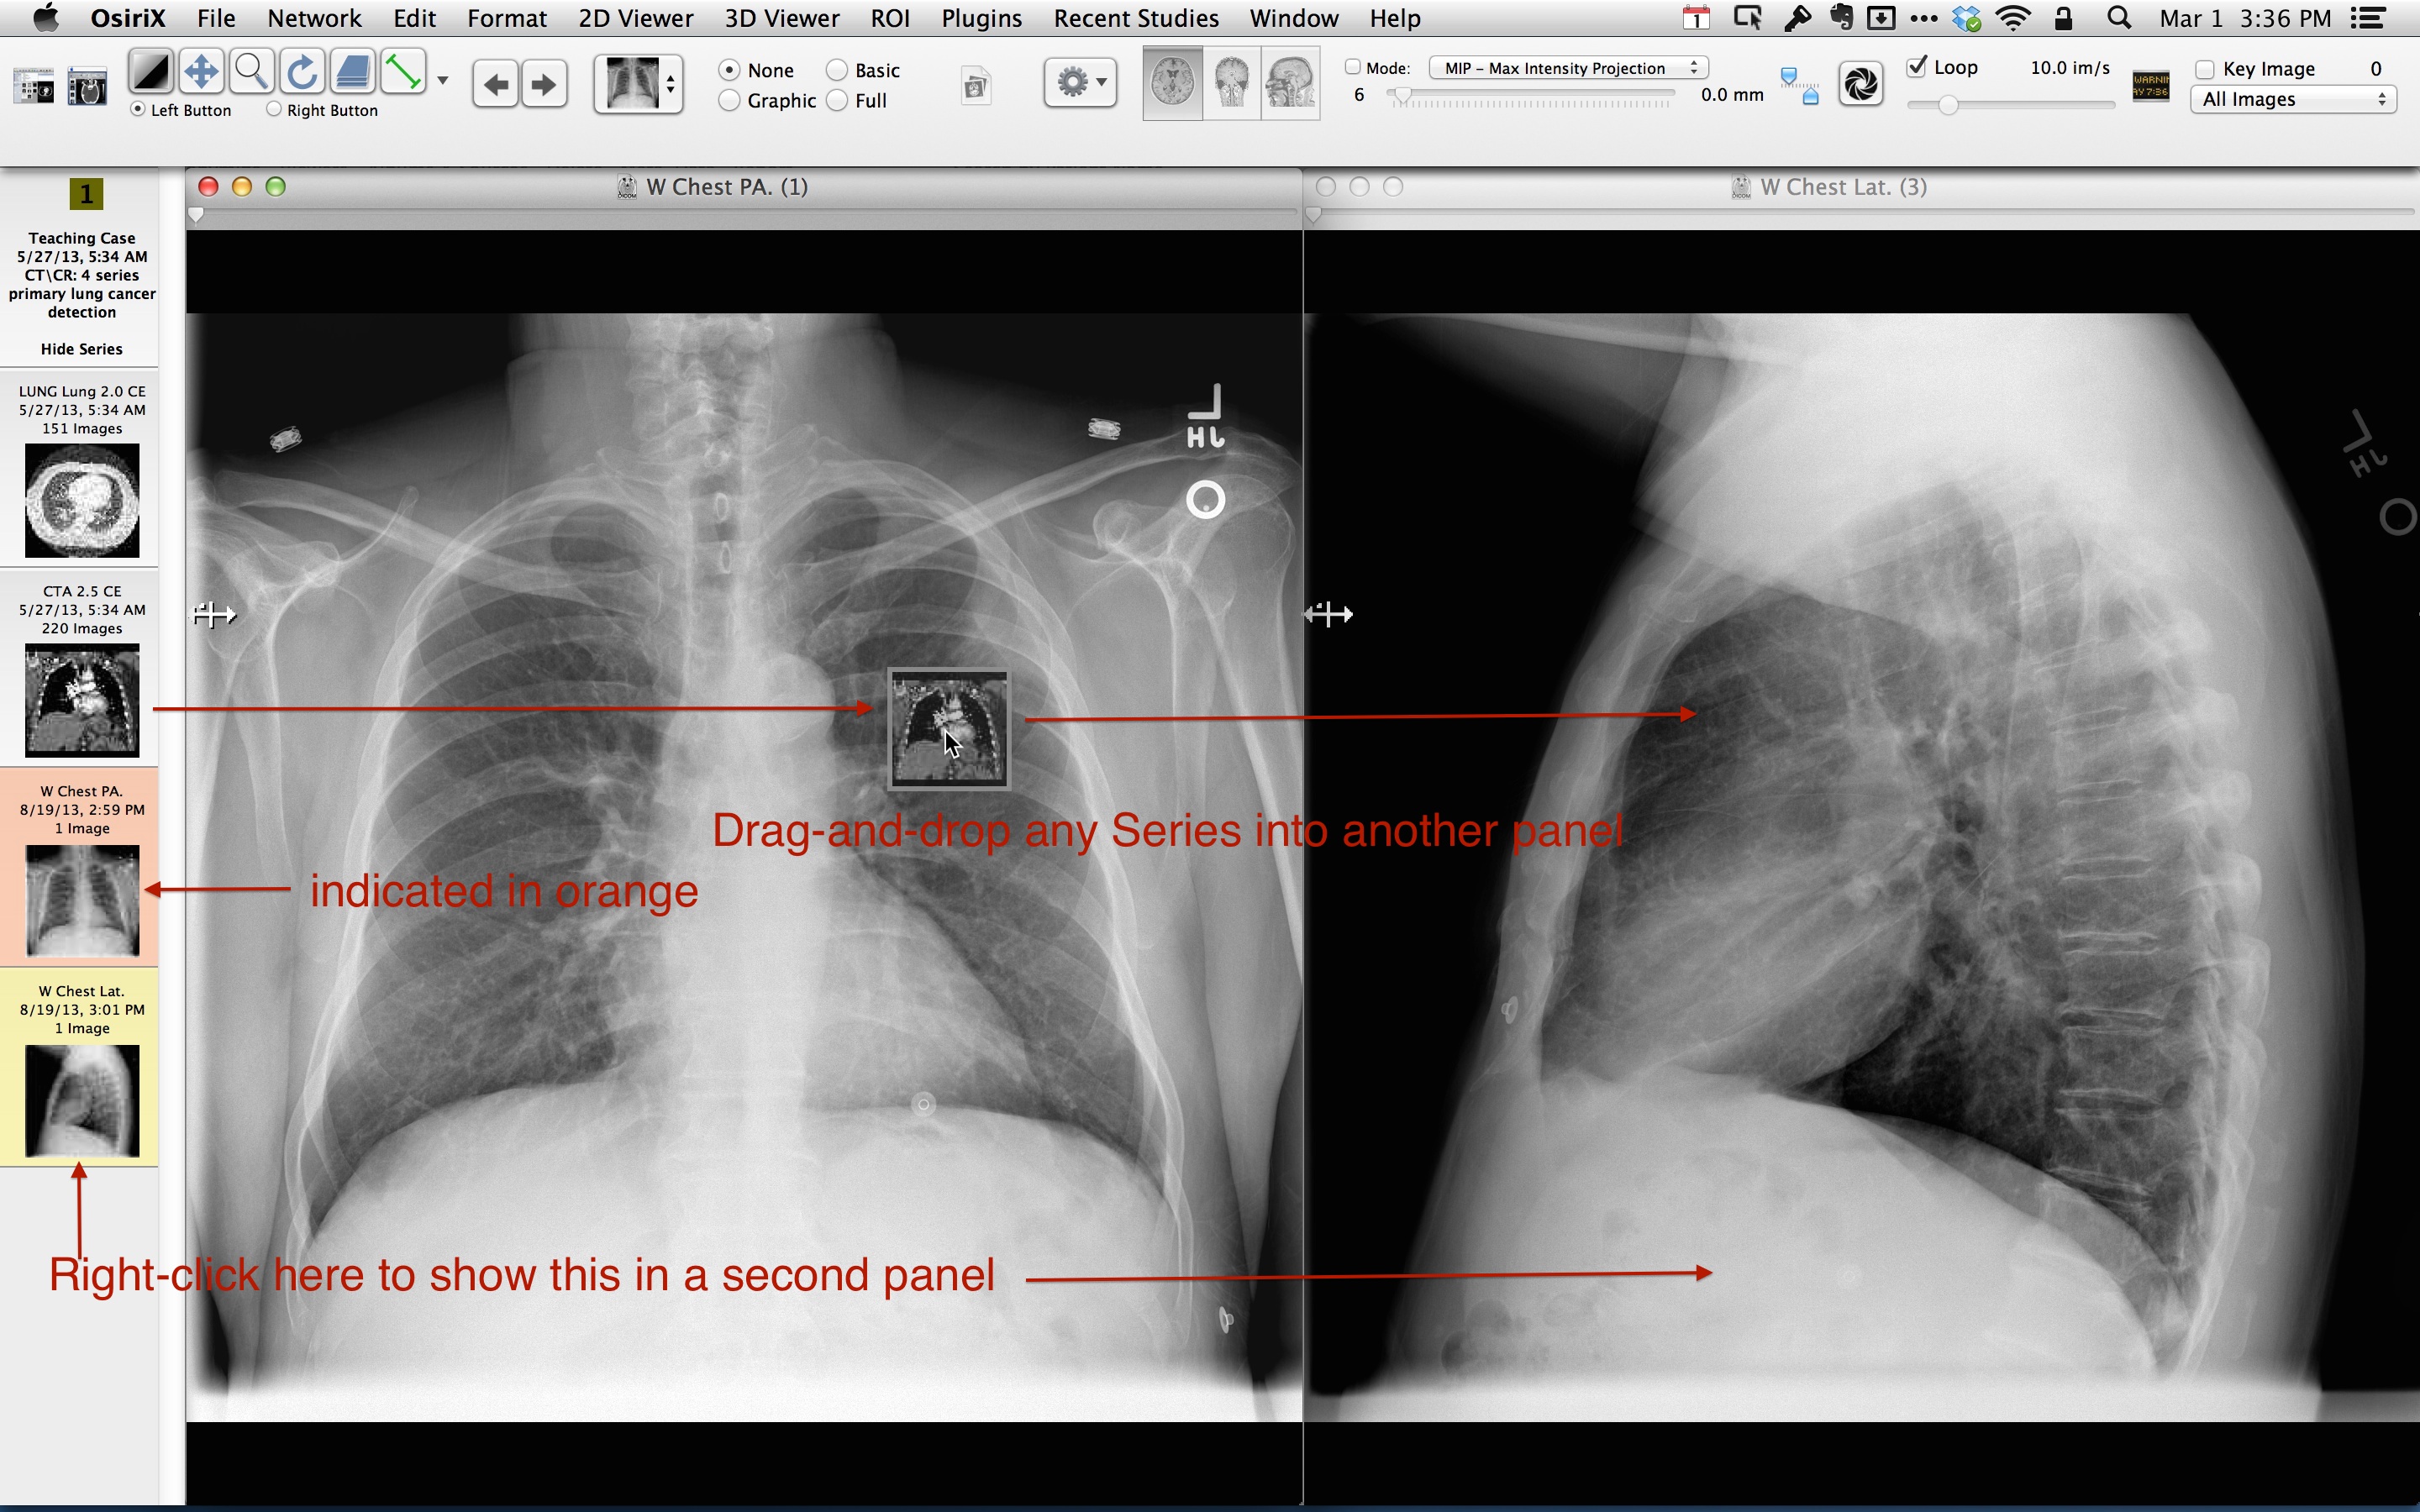
I usually use a maximum of two panels in this window. Launch a Series in a second panel by moving your cursor over the relevant Series and right-clicking. The thumbnail of this second displayed series turns orange. Now you can show different Series by dragging-and-dropping them into a panel as you wish.
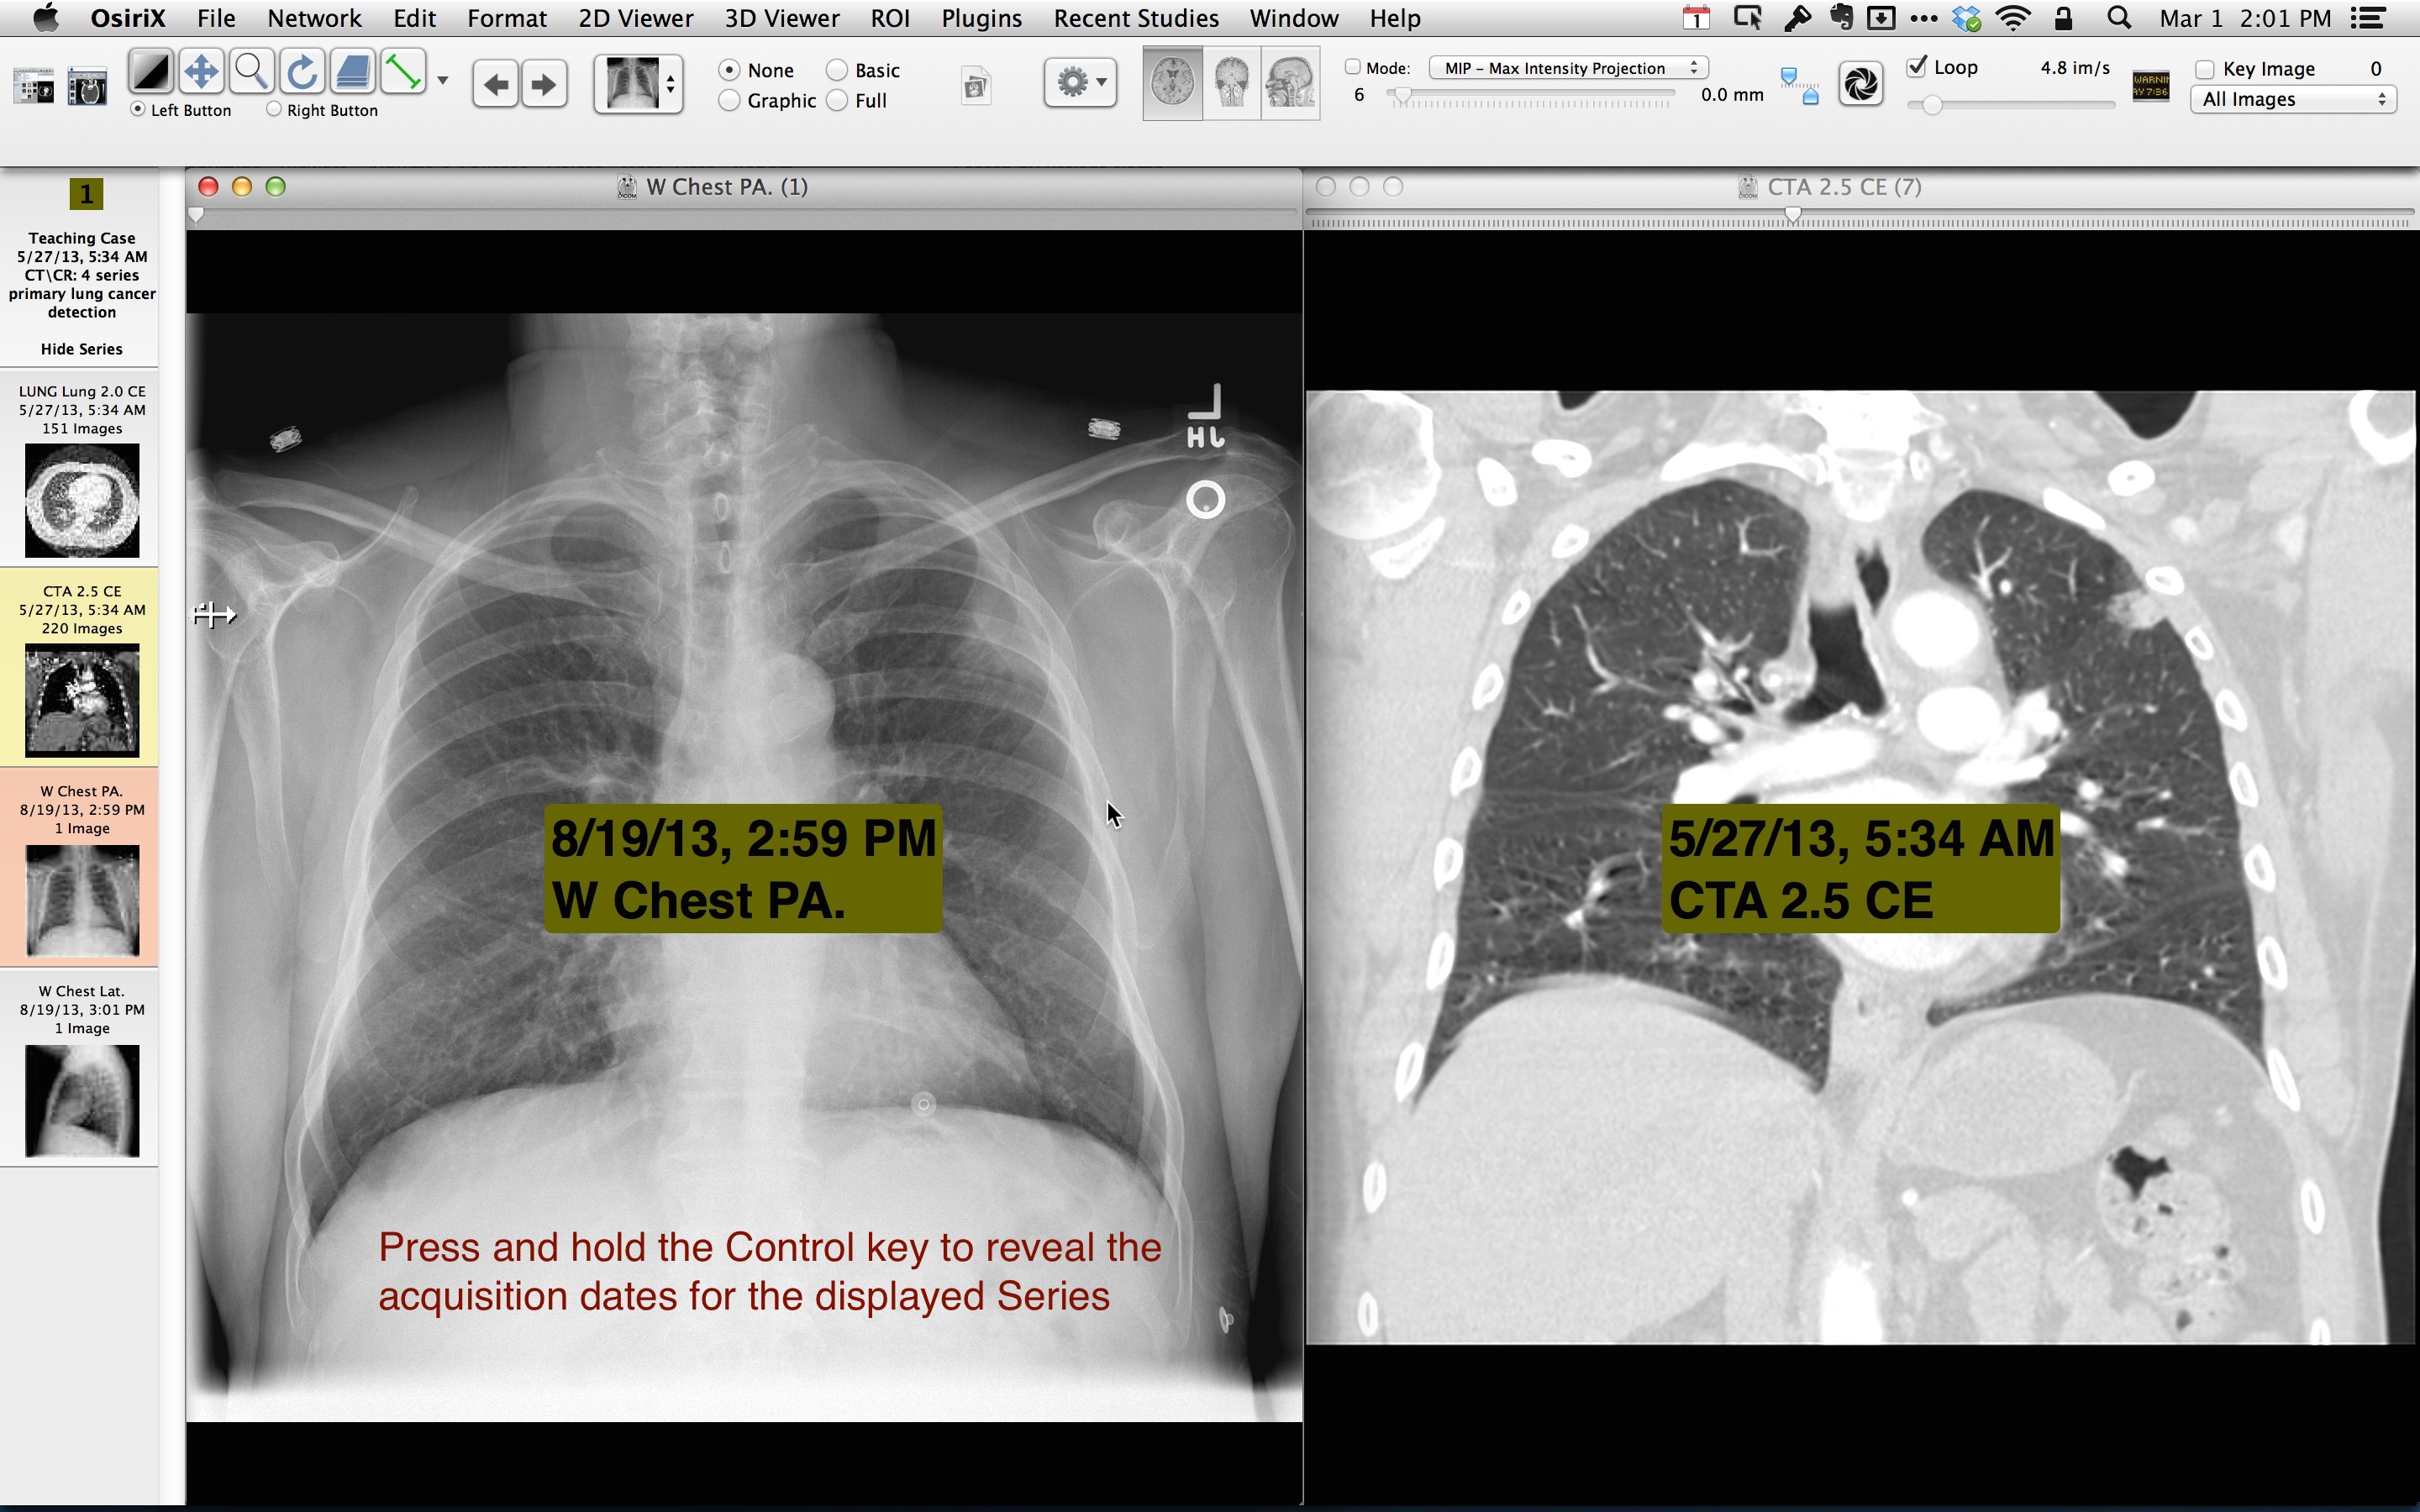
If you’re showing two Series acquired at different times, and want to explicitly indicate the dates of the examinations, press and hold the control key for a moment. The dates will be displayed.
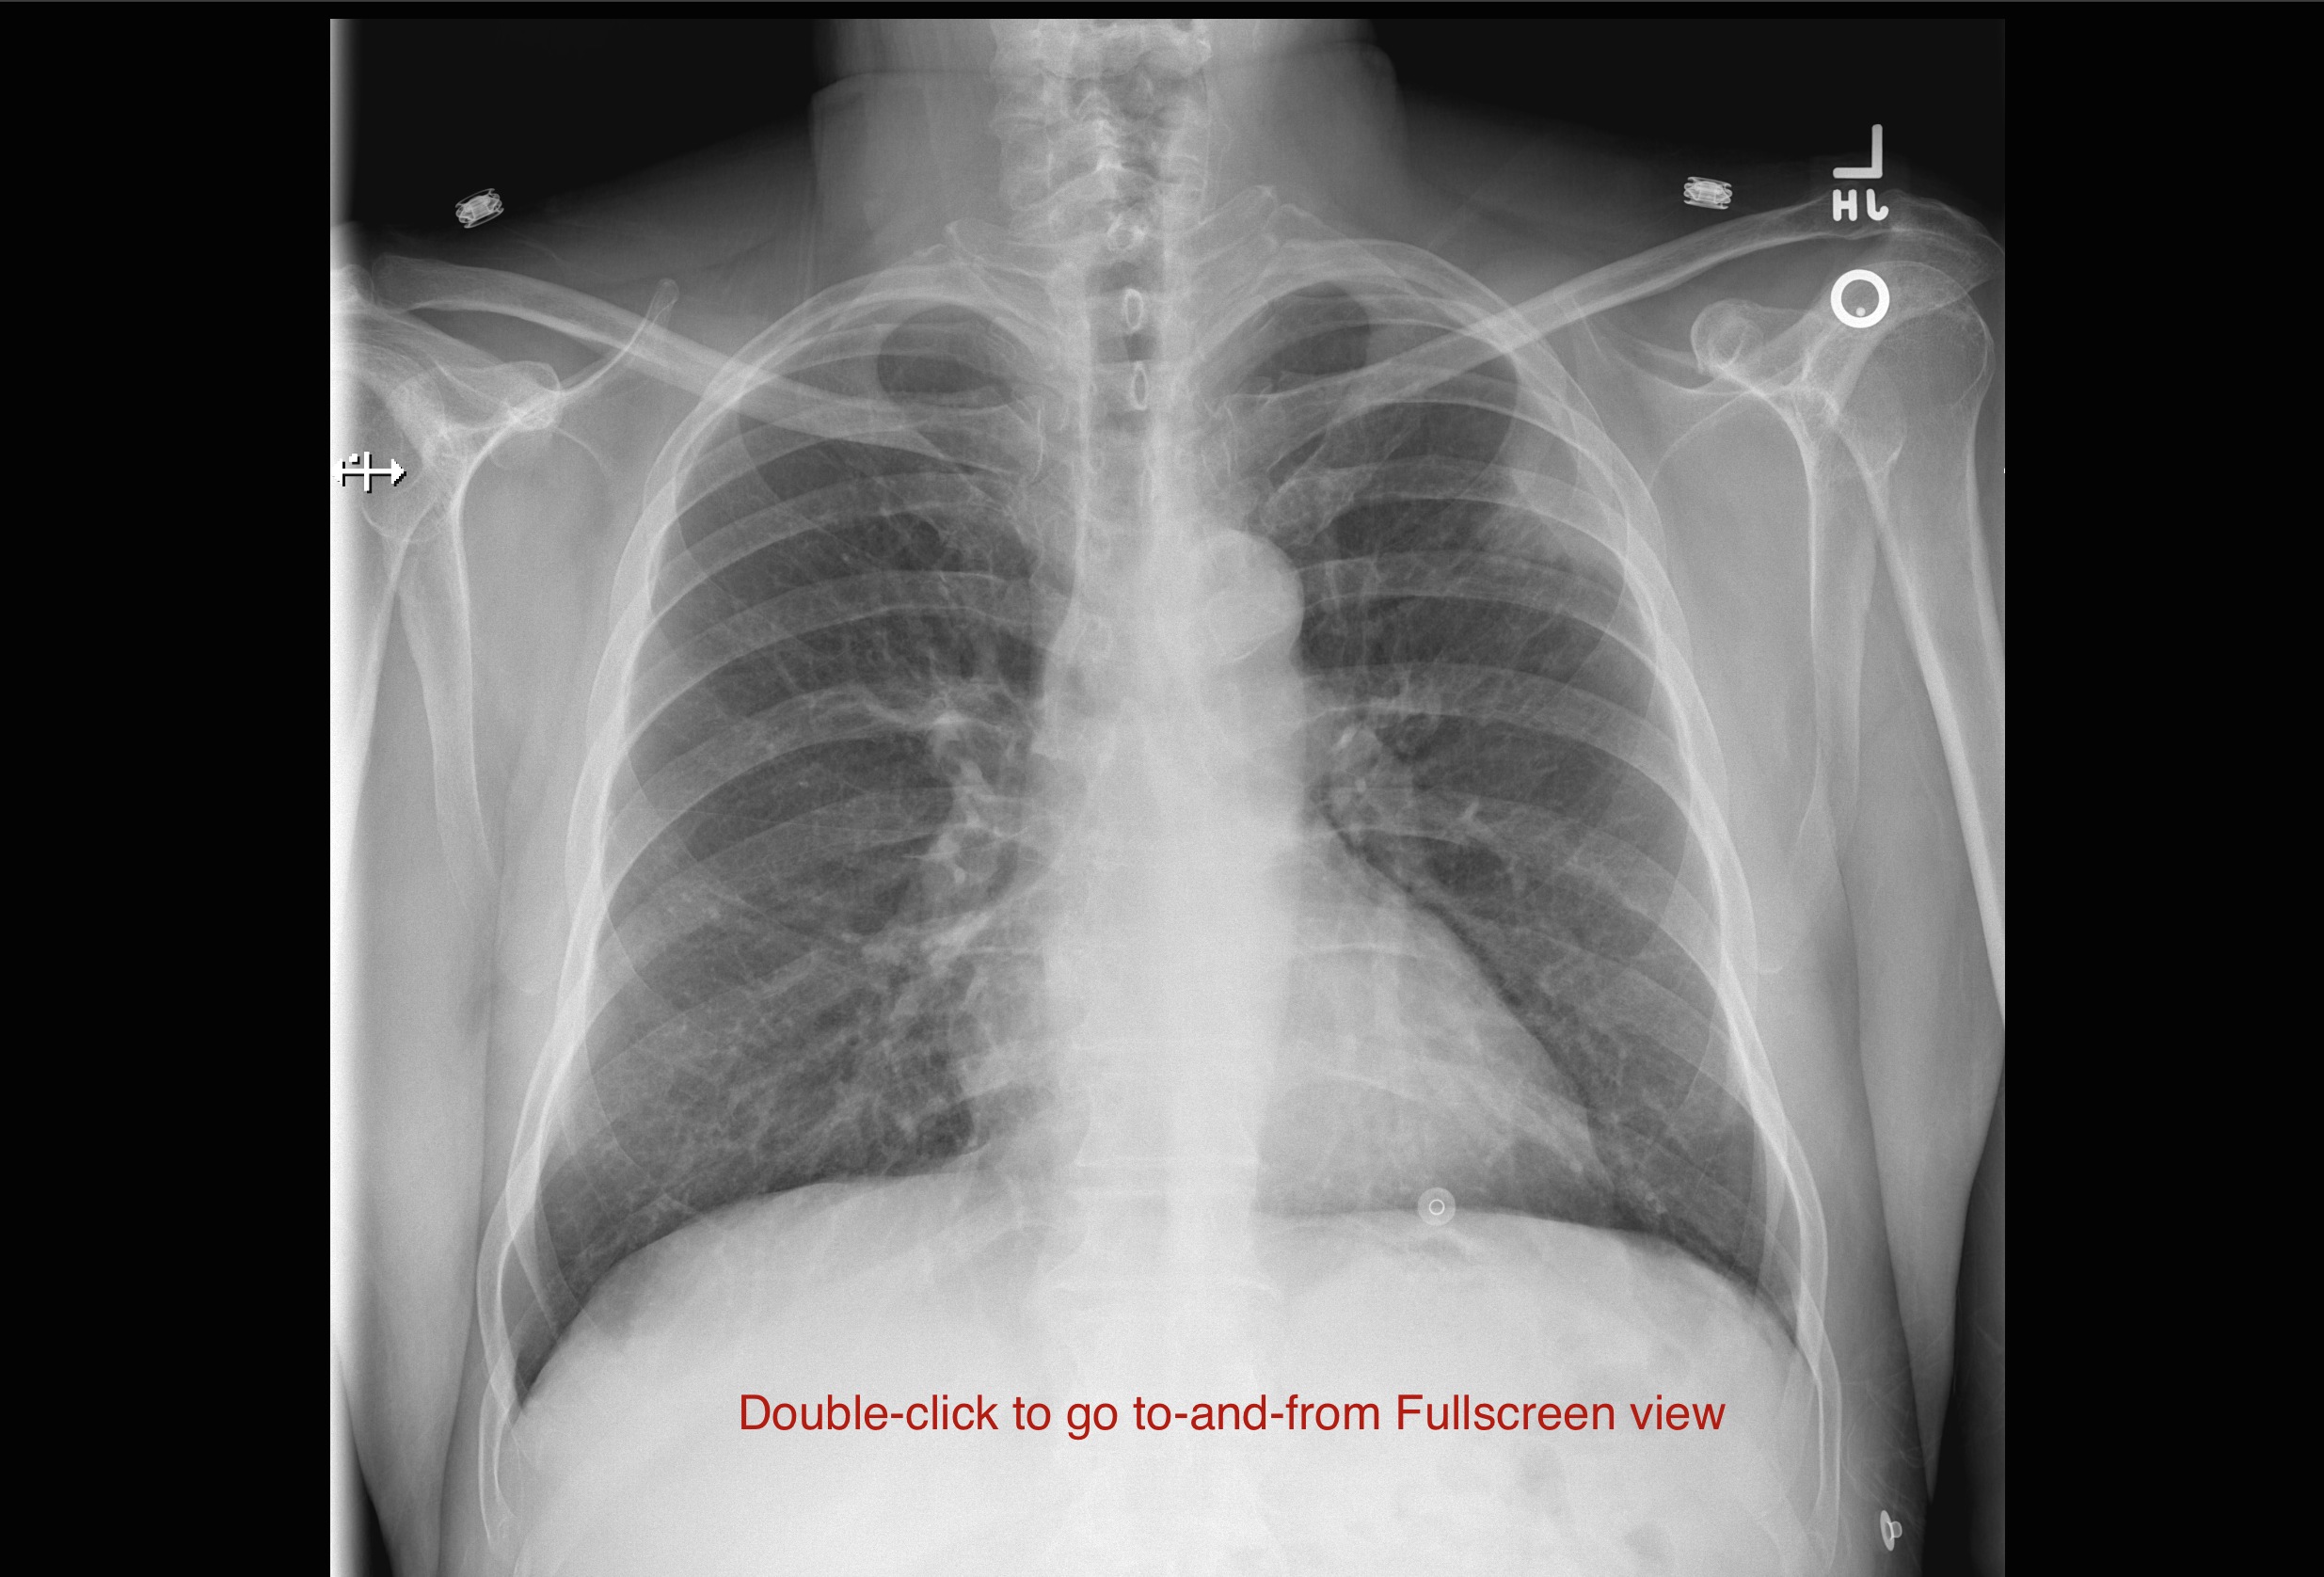
Finally, double-click on an image to show it in Full-Screen mode. Double-click again to go back to the default display mode.
Hiding the Series List to Avoid Revealing the Diagnosis
If you want to show teaching cases as unknowns, and do not want to reveal the diagnosis because of information visible in the Series List on the left side of the 2D Viewer window, you can hide it using the Command-N shortcut. Hit Command-N to reveal it again:
Show
Hide
Useful keyboard shortcuts to use during the presentation
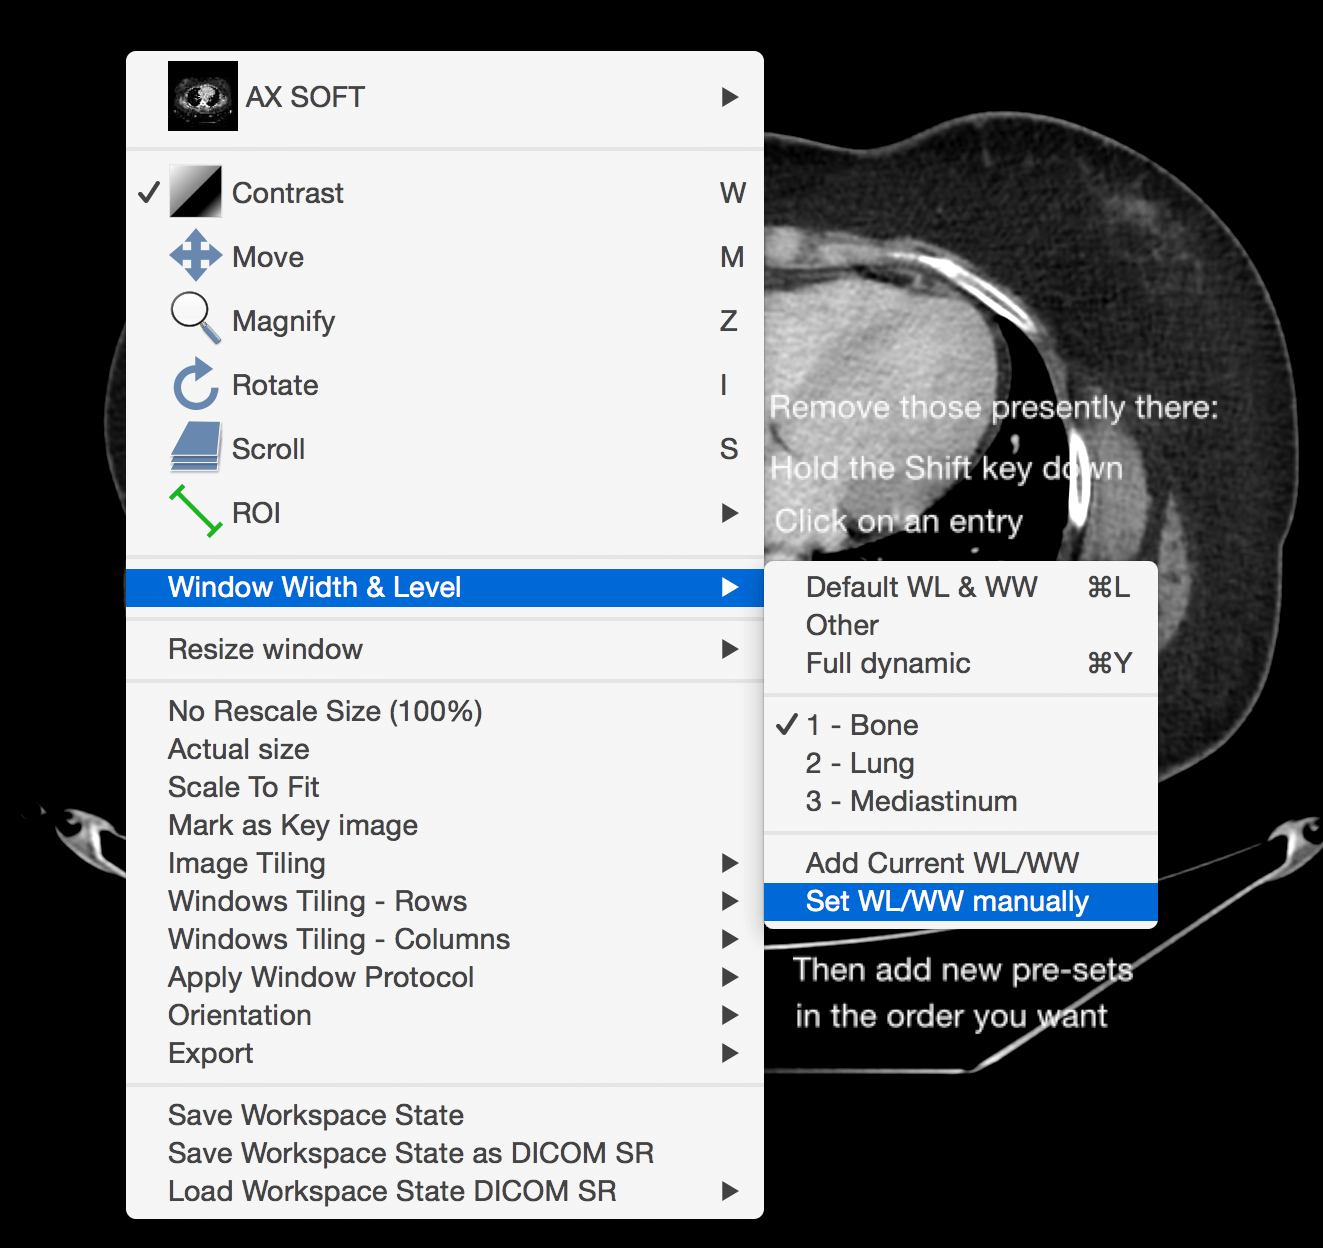
To show thoracic cases, I use pre-sets for computed tomography WW/WL display settings: lung; mediastinum and bone.
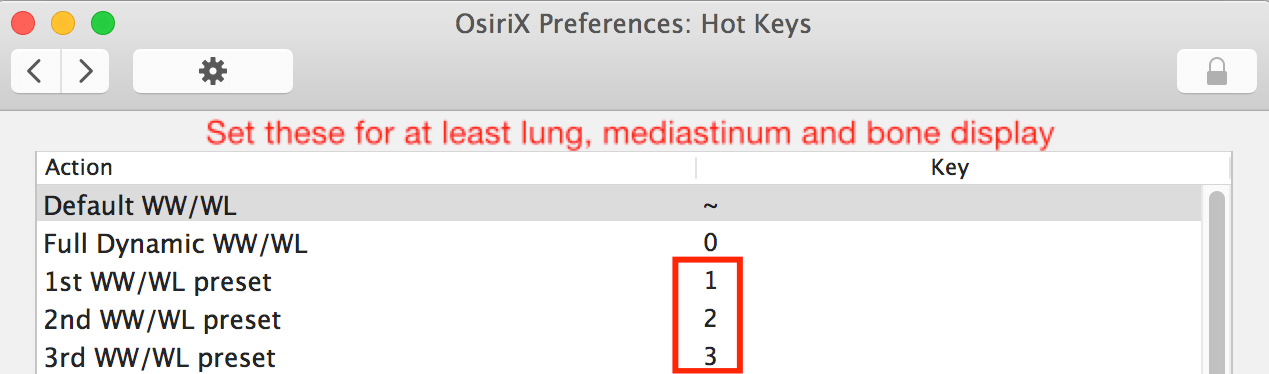
You’ll have to set these up once only, as follows:
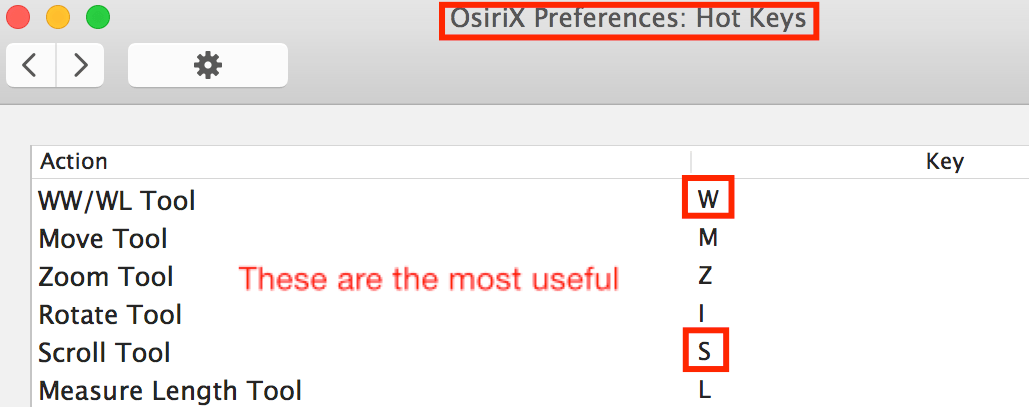
For image scroll, WW/WL manipulation, zoom, and pan (the most commonly used), these are the hotkeys to use to determine the action of the left mouse button:
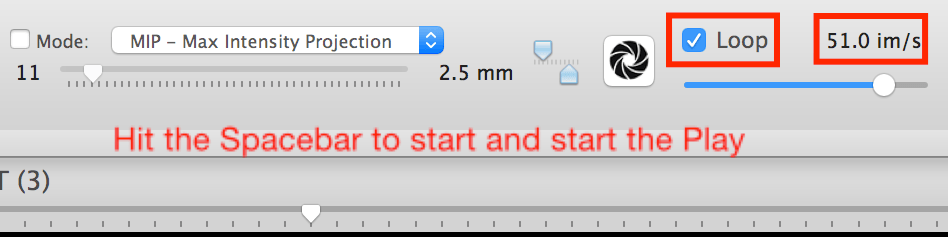
If you’re showing an MRI cine or ultrasound sequence, use the Loop Utility, set an appropriate image frame rate, and hit the Spacebar to start and stop the sequence:
If you want to scroll through two Series simultaneously—or not—keep an eye on the Sync icon in the Toolbar:

Don’t be daunted by the notion of memorizing a few keyboard functions and shortcuts, including those I’ve demonstrated above. They’ll make it really easy to efficiently show your cases.
Here is a tabular summary:
| Key combinations and shortcuts | What it does |
|---|---|
| Press and hold down Shift key; left-click and move mouse (alternative to Z) | Changes the degree of zoom |
| Press and hold down Command key; left-click and move mouse (alternative to M) | Pans the image around |
| Press and hold down the Control key | The acquisition dates of the examinations are displayed |
| Command-N | Hides and shows the Series List (to avoid disclosing the diagnosis) |
| Right-click or Command-left-click on a Series image thumbnail in Series List | Brings up this Series alongside those currently displayed |
| Double-click on a Series Window | This Series is displayed in full-screen mode; double-click to go back |
| When several projections are displayed, put cursor at a point of interest; depress Option key; double-click | The point of interest is displayed on the other projections |
| Command-Y | A Full Dynamic WW/WL range that sometimes displays “problem” radiographic images properly |
| Command-L | Resets to the default WW/WL assigned to that Series; useful if you’ve really messed-up while changing WW/WL |
| Command-R | Resets the Image View to its original state; useful if you’ve messed-up the WW/WL and other settings |
| Command -G | Propagates the change of settings (e.g., a zoom function) to all the displayed Series (Usually an annoyance! Hit Command-G again.) |
| Tab key | Hit this key repeatedly to change the extent of annotations displayed |
If you remember these, you’ll be set…
Cheers!