Jan 29, 2014
Anonymizing A Case With DicomBrowser For A Teaching File And Sharing With Colleagues
Update June 2016: While DicomBrowser is a great application, anonymizing a case with another application— DICOM Anonymizer— is easier. This guidance document describes how to use it.
A common method for preparing a case for inclusion into a teaching file and sharing with colleagues involves the initial placement of the folder containing the non-anonymized DICOM images on the Desktop. At this point, one can first anonymize the data (outside of OsiriX), re-label the case with a diagnosis, check that all personal information has been anonymized, and then share the anonymized case with colleagues.
In this guide I’ll describe a quick stepwise method for accomplishing this with a free application, DicomBrowser.
A summary of the stepwise process is the following:
- Put the folder of DICOM images on your desktop. For convenience, name the folder with the diagnosis, or a shortened version of it.
- Start Dicom Browser and use it to open the folder of images. At the “Patient” level, use an application-associated script to anonymize the data. Identify and delete any unnecessary fields containing private information. Edit selected fields to label the case with a diagnosis and case number as necessary.
- Drop the folder of anonymized data into the OsiriX Database window. Choose any one CT or MRI Series in the study, click
meta-dataand scroll all the way down the window to confirm successful anonymization of the data. If necessary, use OsiriX’s meta-data editing function to anonymize or remove any residual private information the application did not delete. - Share the anonymized case with colleagues.
Here are more details about each step of the process.
Getting and preparing DicomBrowser
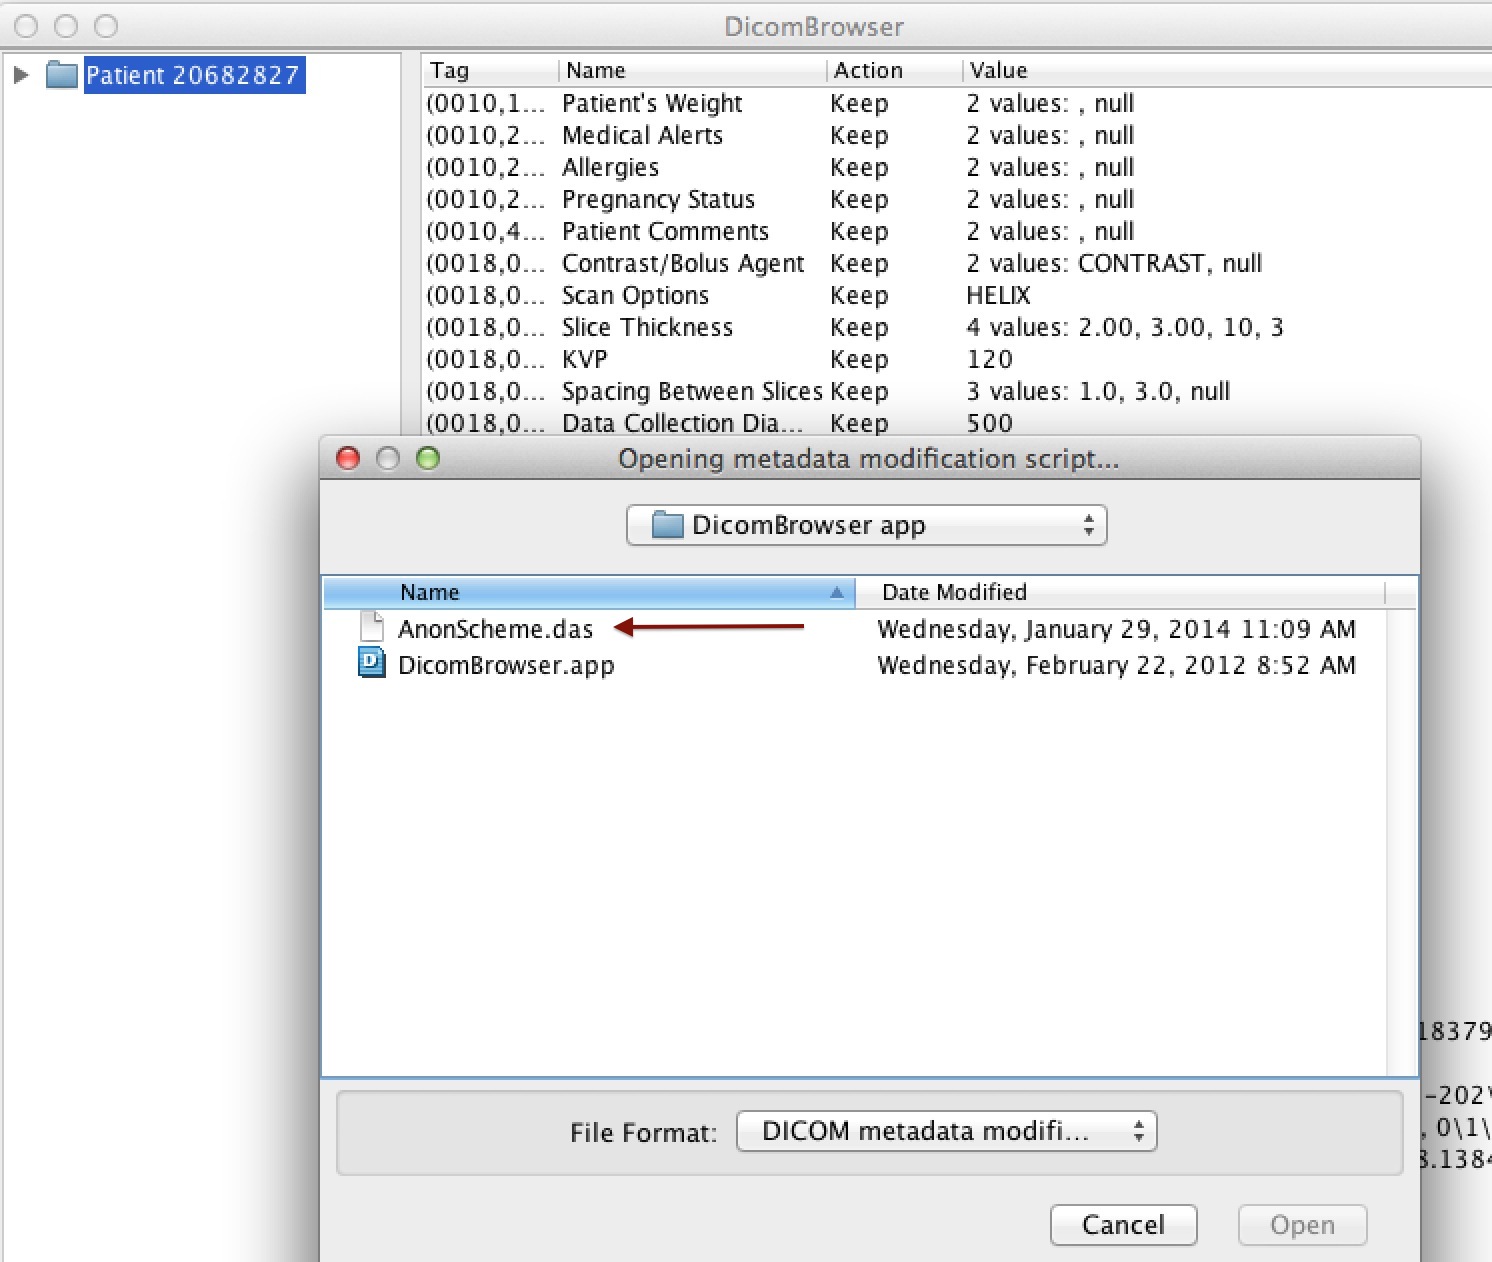
Download and install the Mac version of the application. Create a new folder in your Applications Folder called DicomBrowser. Move the application into it, as well as a script file, called AnonScheme.das, that you can download here.
I’ve modified the script file for purposes of a Teaching File. Relevant information such as the patient’s age and gender will not be removed.
Using DicomBrowser to anonymize the data
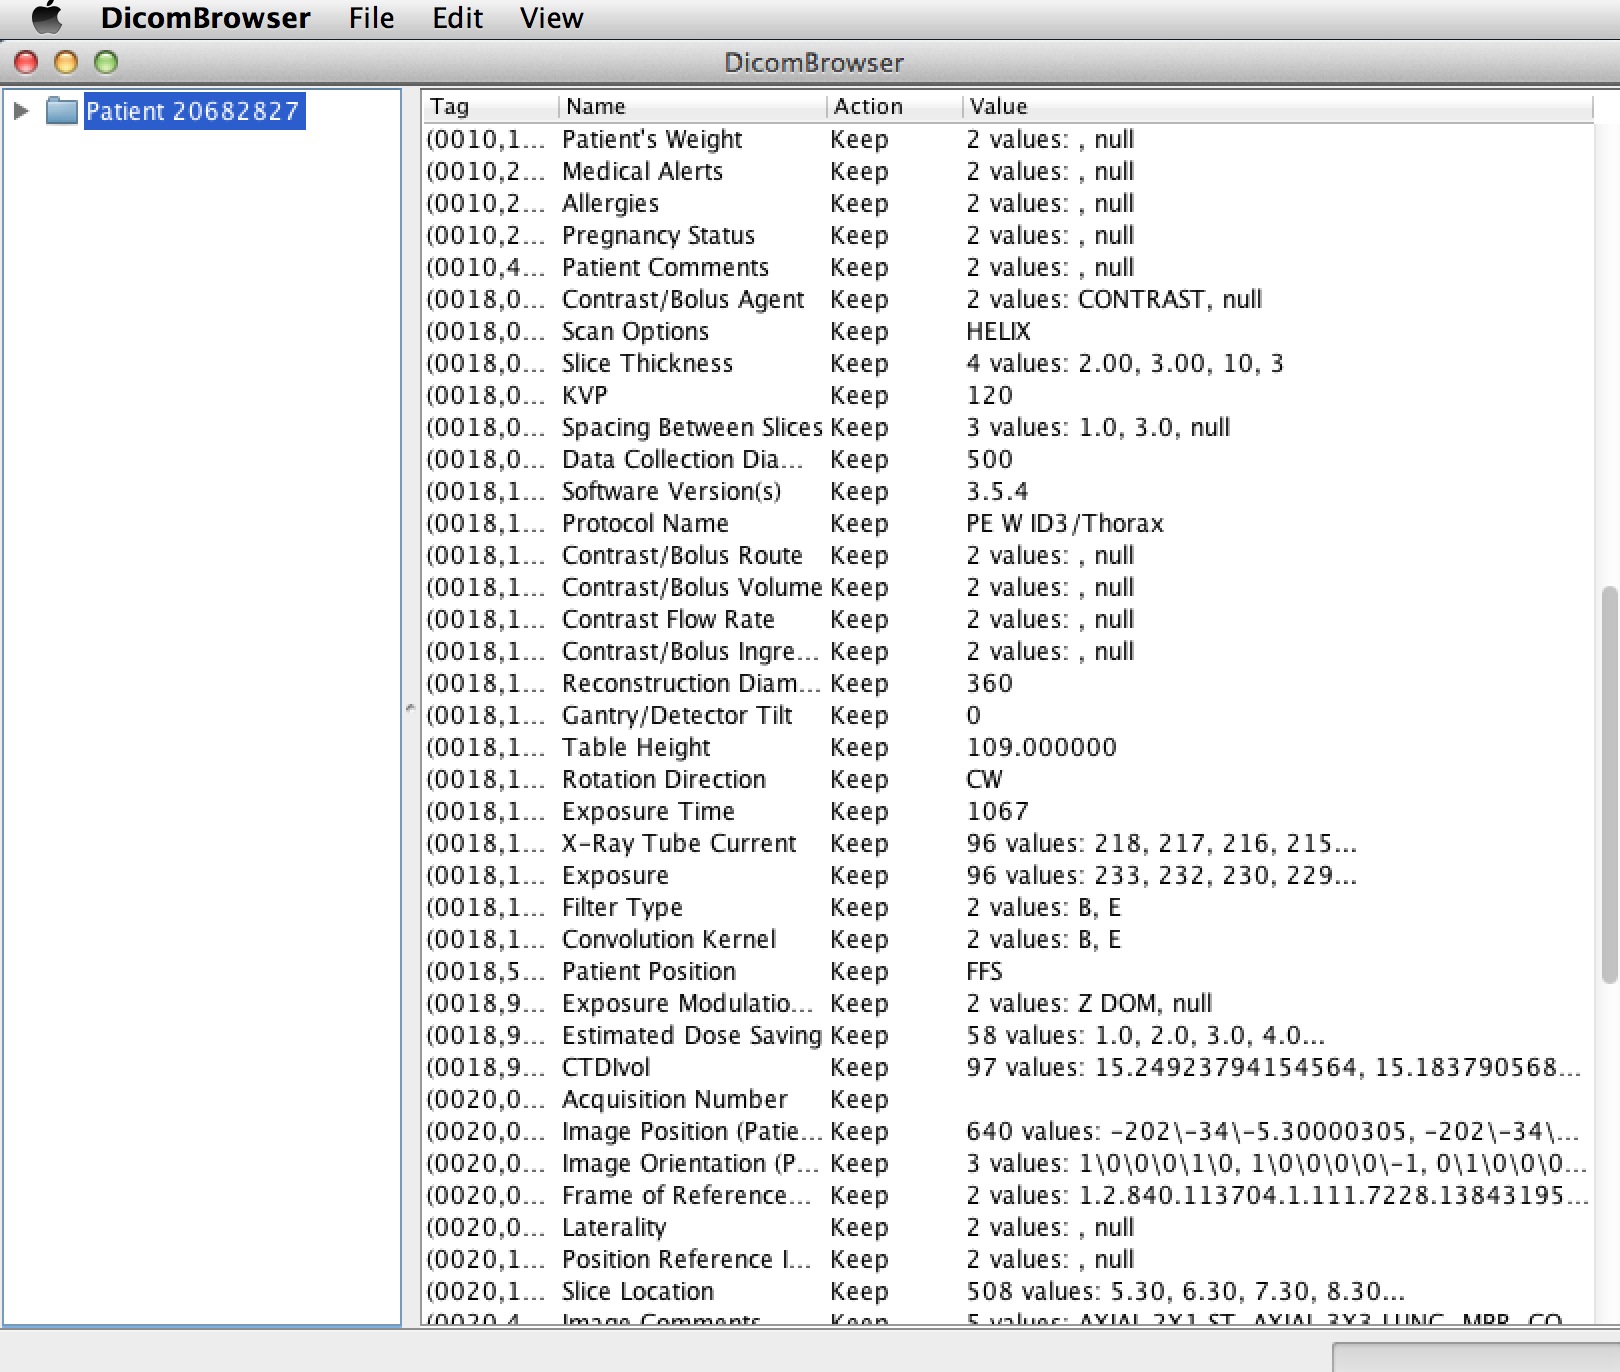
Open the application, choose the menu item File: Open, and navigate to the folder on your desktop. When the case is loaded, it looks like this:
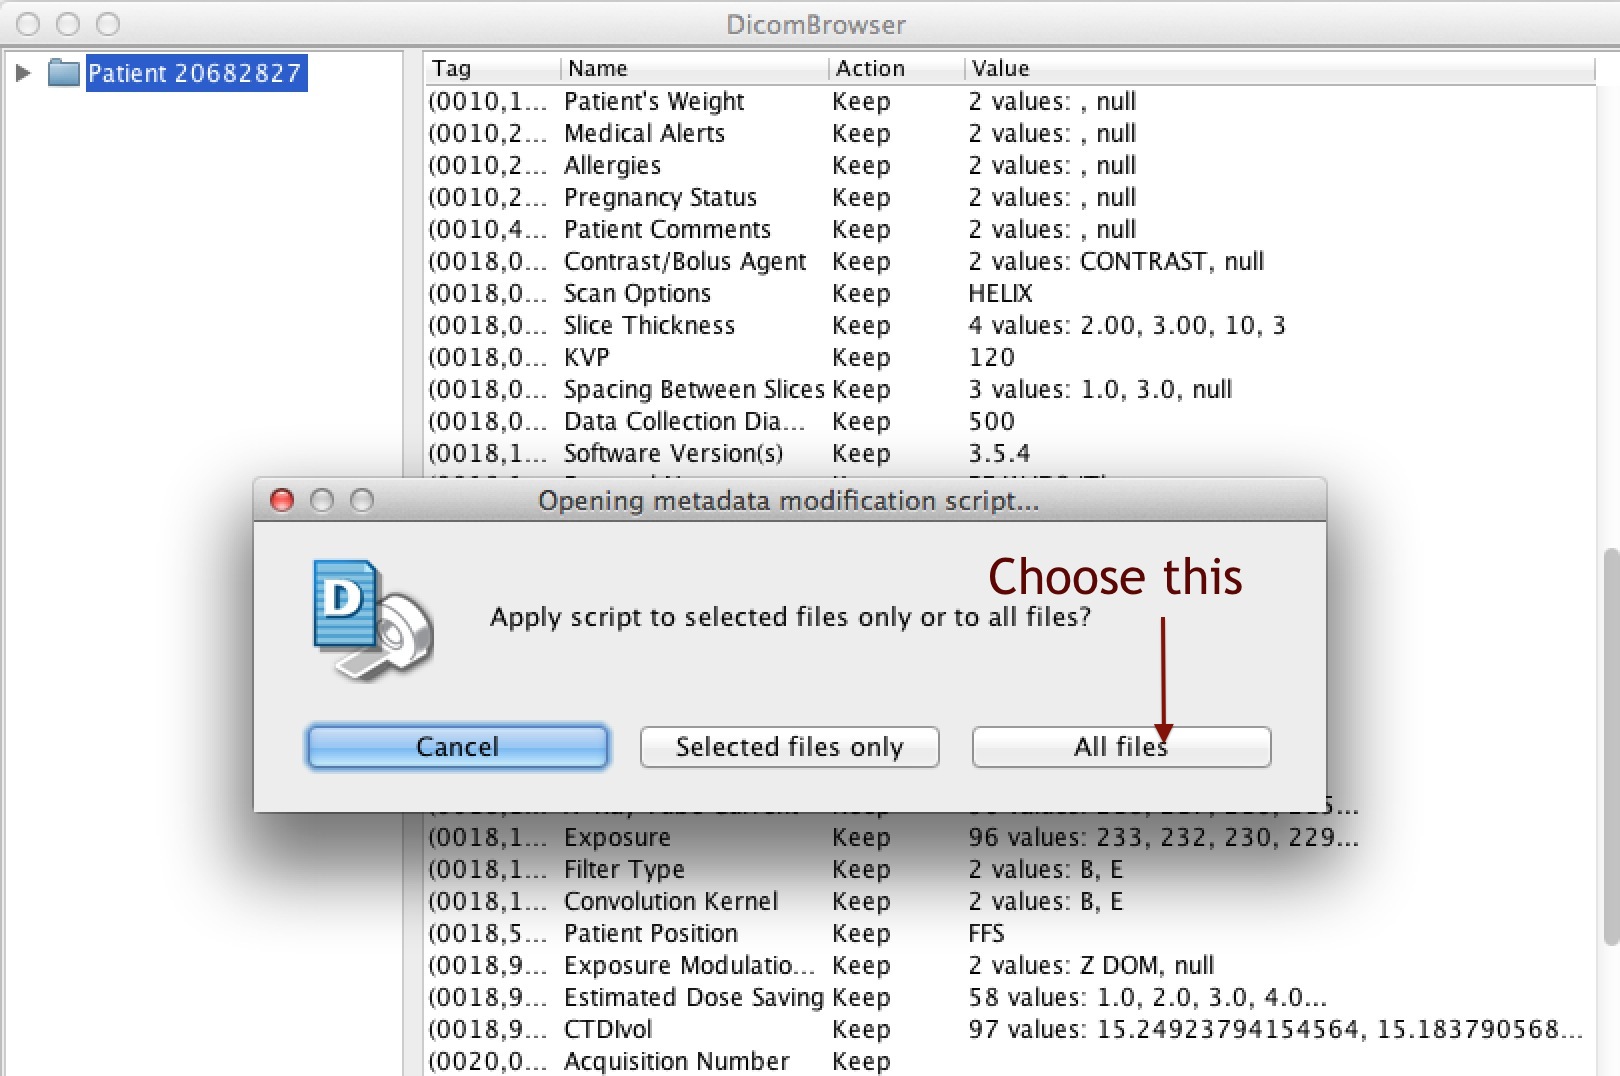
Now choose the menu item Edit: Apply script… and navigate to the folder in your Applications Folder mentioned above. Apply the script to all the files.
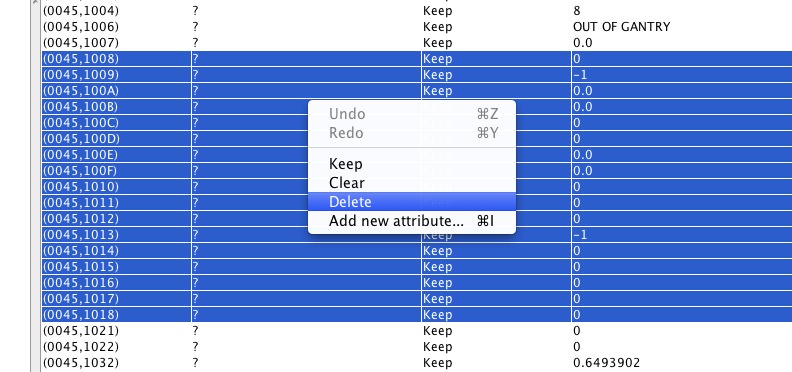
Now scroll down the entire Window looking for remaining private data, oftentimes written in “Unknown” fields. If you find any, and they are contiguous, select them all, right-click and choose “delete.” This is a quick way to get rid of them.
This is what this process looks like.
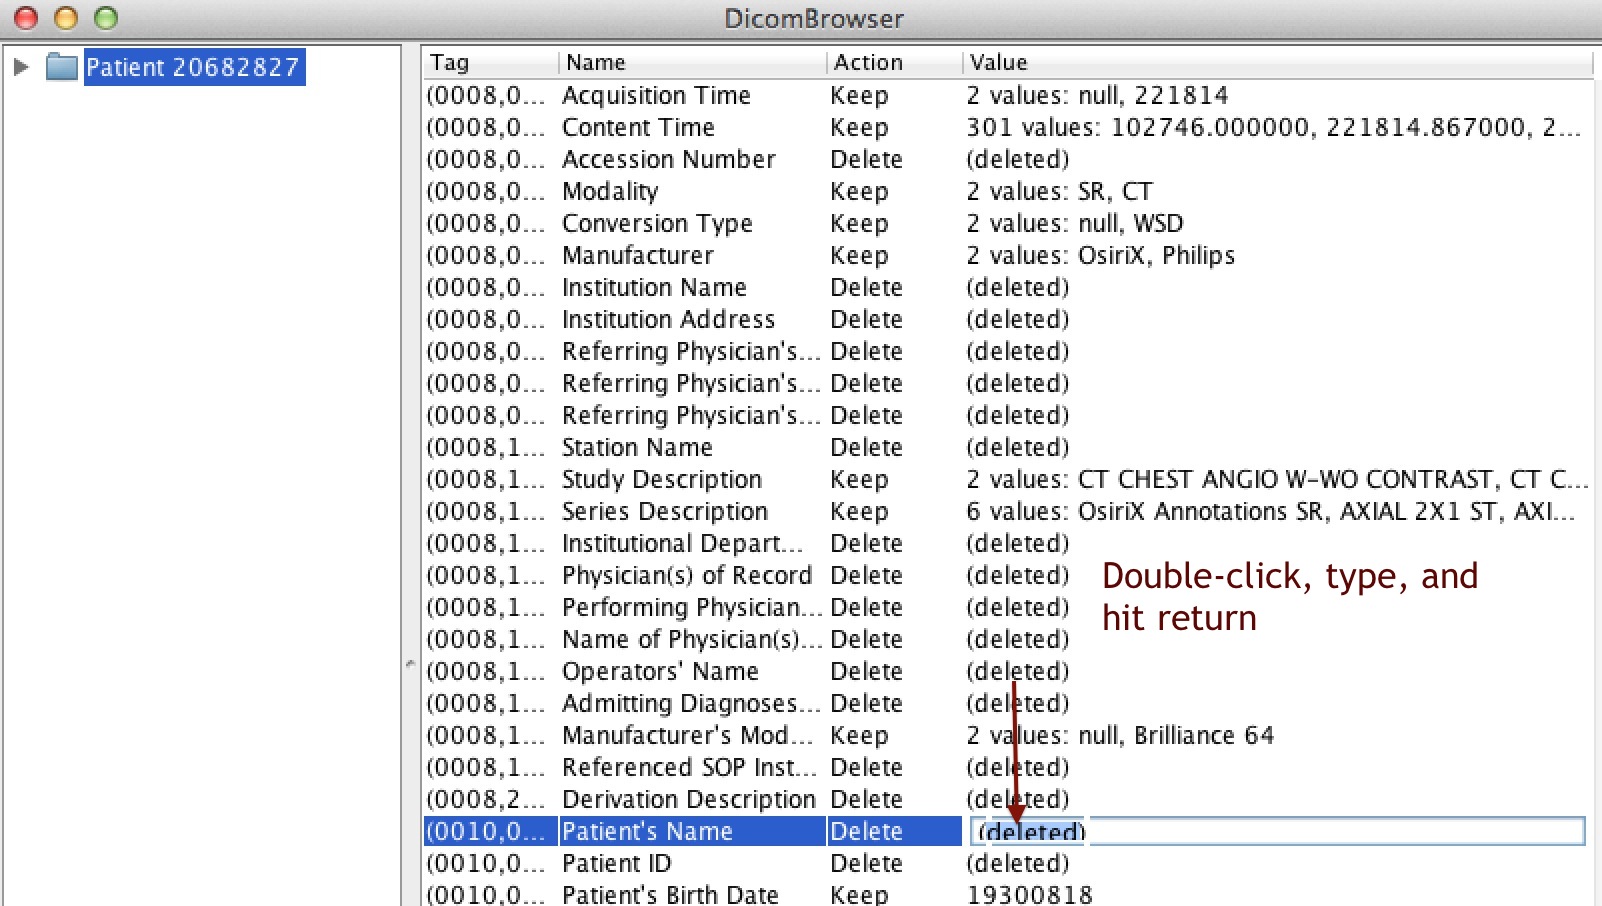
Now that all the files have been appropriately anonymized, the next step is to manually edit a few items suitable for a Teaching File case in OsiriX. For our collaboration, edit the following four items:
- Replace the Patient’s Name with the Diagnosis
- Replace the Accession Number with your initials
- Replace the Patient ID with the case’s identification number in your personal teaching file
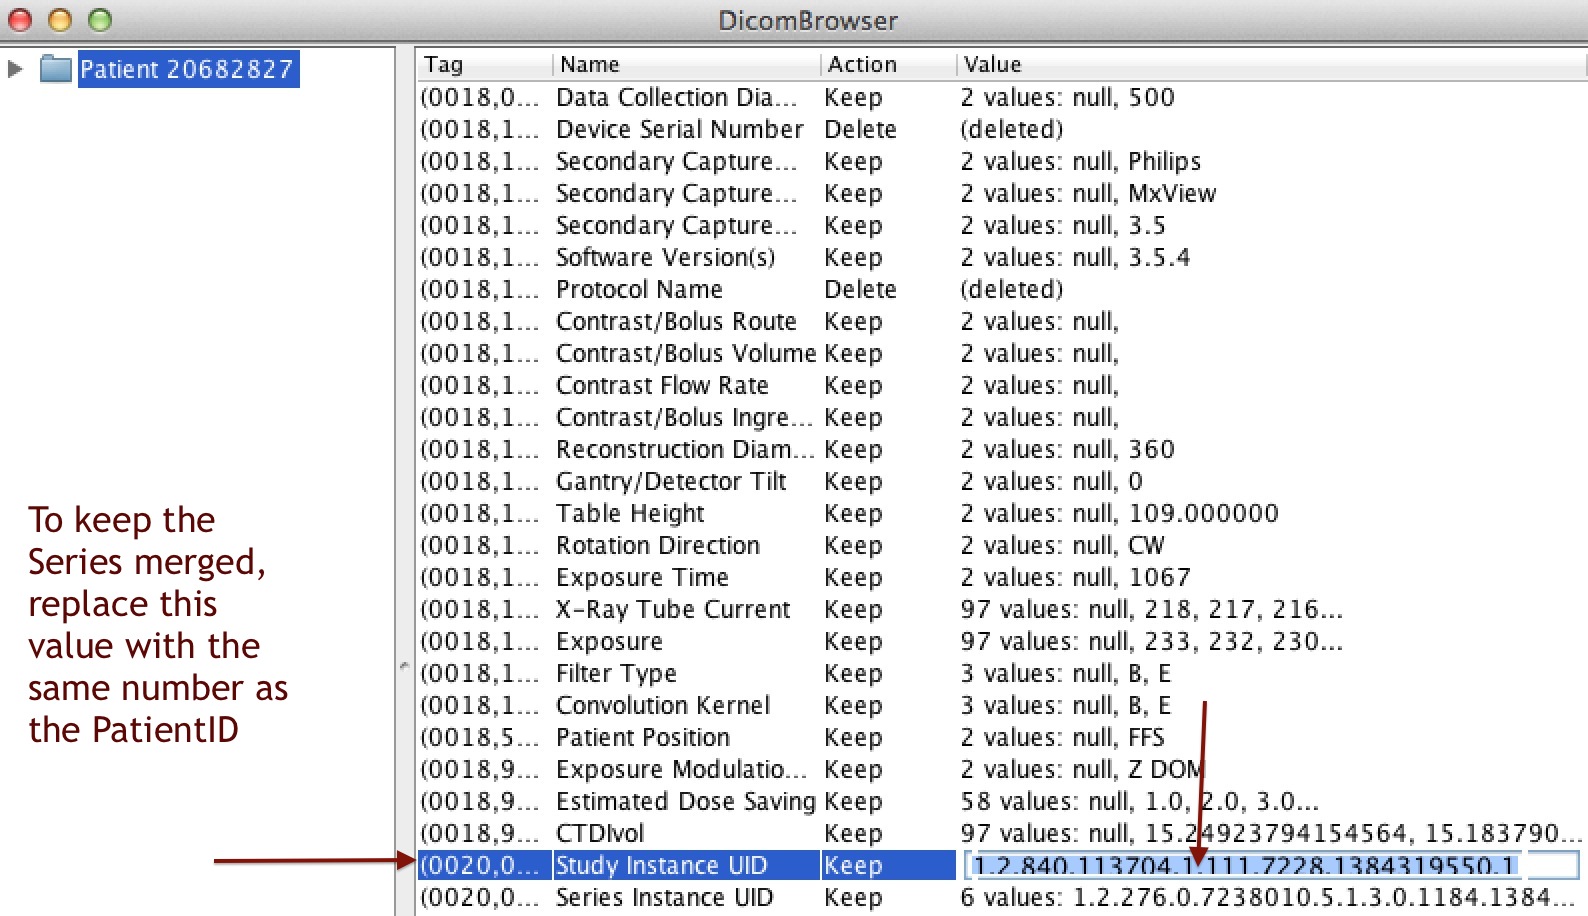
- Replace the StudyInstanceUID with the same case identification number
Important: Step 4. is necessary to keep all the Series of the Study properly merged in your OsiriX database
Update June 2016: To adhere to the Dicom Standard the proper number for the StudyInstance UID should be derived from your personal UID root (prefix), not just the Case I.D. Number.
Review this guidance for information about getting this prefix and how to use it. It’s easy!
Optional: You can then expand Patient in the left DicomBrowser panel to see the component Studies and Series to selectively edit any particular field at any level you wish.
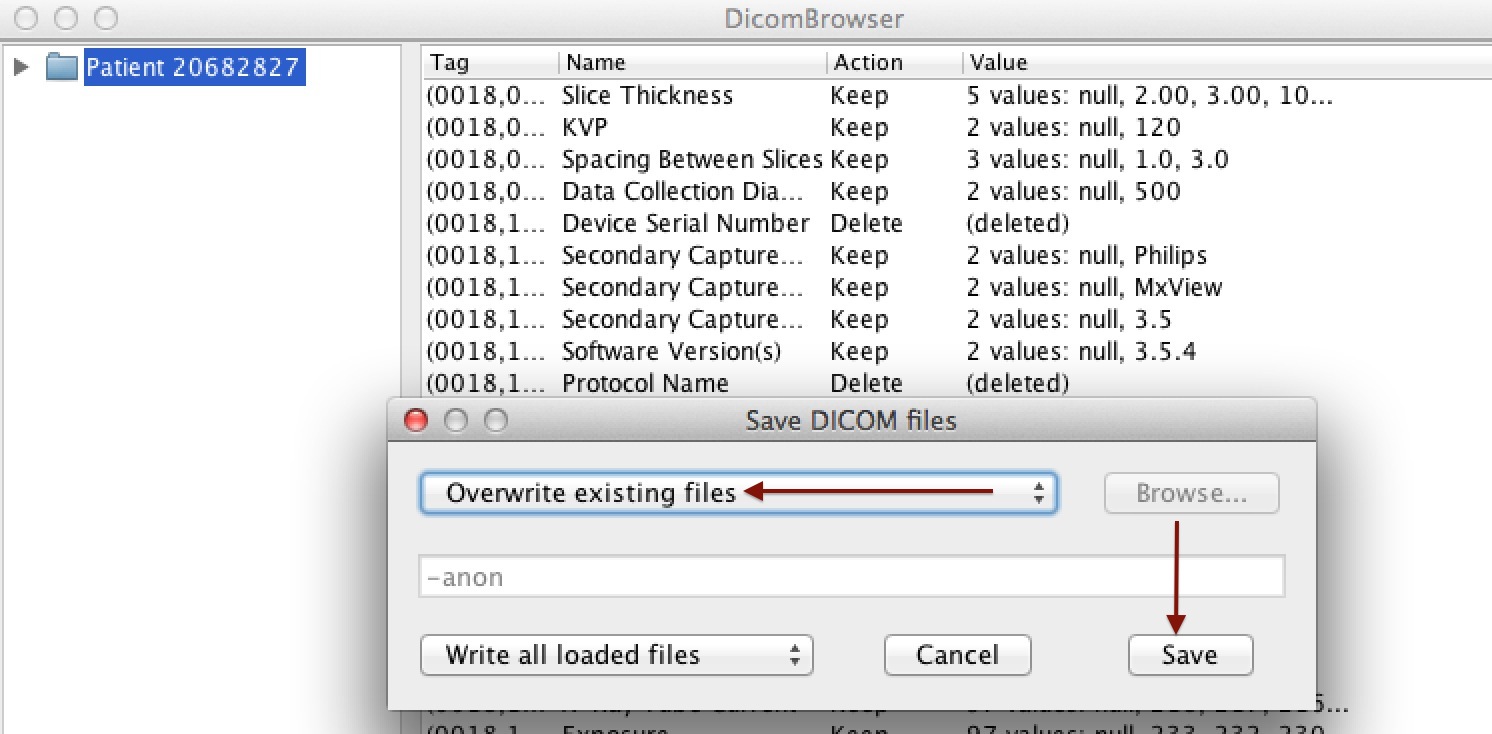
When you’re finished, overwrite the files, and save, as follows:
Import the case into OsiriX to confirm complete anonymization of the case
Drag-and-drop the folder into OsiriX. Select Copy Files. Choose a CT or MRI Series in the case, click meta-data and scroll through the window to the bottom, checking the fields for private data as you go. Unfortunately, it is not uncommon for private information to be written in “Unknown” private fields. If you see any remaining— which now should not be common— delete these in the usual way with OsiriX’s meta-data editor. If you have to do this, you’ll have to export the case again to a folder to share it.
Otherwise, you’re done, have a new case in your Teaching File, and can share it with colleagues!