Mar 23, 2013
Preparing An OsiriX Teaching File Case
In this document I’ll describe how to prepare a case for inclusion in an OsiriX-based Teaching File Server or sharing with colleagues.
I suggest you employ the following stepwise process:
Contents
- getting a DICOM case into OsiriX
- selecting and merging Series for inclusion and anonymizing the case
- cropping selected images to remove extraneous anatomy, objects and identifying information
- specifing Key Images for the case
- creating a report using Pages and converting it to a DICOM file
- sending the case to a Teaching File server
- exporting a case for sharing using a cloud-based server account
Getting a DICOM case into OsiriX
In general, this involves getting the case to your laptop OsiriX. If your PACS system permits you to export a case in DICOM format with one click, the most efficient method is to ask your IT department to assign your laptop a static IP address, usually via so-called dynamically assigned static IP addresssing. Then, ask the IT folks to register your OsiriX laptop as a DICOM-node on the PACS administration module with that IP address, connect your laptop to the network via an ethernet cable, and export the case directly.
Here is a screenshot of me sending a case to my laptop OsiriX directly from our Philips iSite PACS:

I always have my laptop connected by ethernet cable to the LAN at the PACS Workstation I’m working at, so I can do this during my time in the Reading Room. I’ll merge the Series of the case as necessary, anonymize it, check the meta-data again to verify that the anonymization of personal information is complete, and finish the preparation of the case later.
Otherwise, export the case from your PACS to a USB thumbdrive and transfer it to your laptop by a simple drag-and-drop onto the OsiriX window. Choose Import Files when prompted.
Selecting and Merging Series and Anonymizing the Case
The first step here is to review the CT and MRI Series and delete all extraneous images, such as CT Scout Topograms, CT Dose Information displays and MRI localization Series, that need not be in a Teaching Case or that contain embedded personal identifying information.
At this point, you can merge all the Series by selecting all of them, right-clicking and choosing Merge Selected Studies.
Now, anonymize the case.
Using OsiriX’s anonymization utility
If you use OsiriX’s anonymizer, here is the scheme I currently use which removes most Tags that contain personal information.
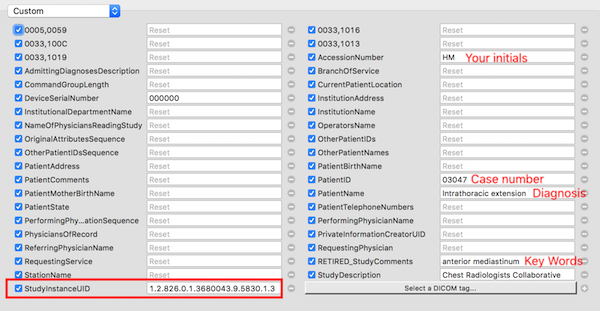
Tip: When you use the "Merge" command in OsiriX to merge all the Studies/Series of a particular case before anonymizing it, the component Studies will be split again when you DICOM-send or Retrieve it from the Server. This is annoying! Prevent this by putting an appropriate number in the DICOM Tag "StudyInstanceUID", as indicated above in the graphic.
This number should be derived from your personal UID root (prefix) that you use for all the cases in your Teaching File(s). Review this guidance for information about getting this prefix and how to use it. It’s easy!
The Diagnosis you insert should not be longer than 64 characters to comply with the Dicom Standard.
With all the DICOM tags I’ve added to this scheme most cases are anonymized such that all personal information is removed. But not always. Scroll through the Metadata of a Series of a case to be sure that none is left. If any remains, use the manual method to remove it. (You can also use the following manual method to edit any particular field(s) in the DICOM Header (Metadata). )
The Manual Method
OsiriX permits one to edit any particular field in the DICOM header. This is a three-step process as indicated below:
- Activate the editing function by clicking on
edit. - Double-click on an entry to edit it and hit return. Edit other items as necessary.
- Click
Applyspecifying theStudylevel so that all the Series of the Case are changed.

Using DICOM Anonymizer to anonymize cases
If you do not use OsiriX to anonymize a case, a great application to do this is DICOM Anonymizer. Apply this application to the folder containing the case before you import the case into OsiriX.
Review my guidance document on this web site for details on its use.
Removing personal patient information embedded in an image
Sometimes, for example, with an ultrasound image series, PHI is embedded in the image and cannot be removed by editing the DICOM header. In this case, the relevant portion of the image has to be removed, the resultant image saved as a separate Series, and the original Series deleted.
The process is as follows:
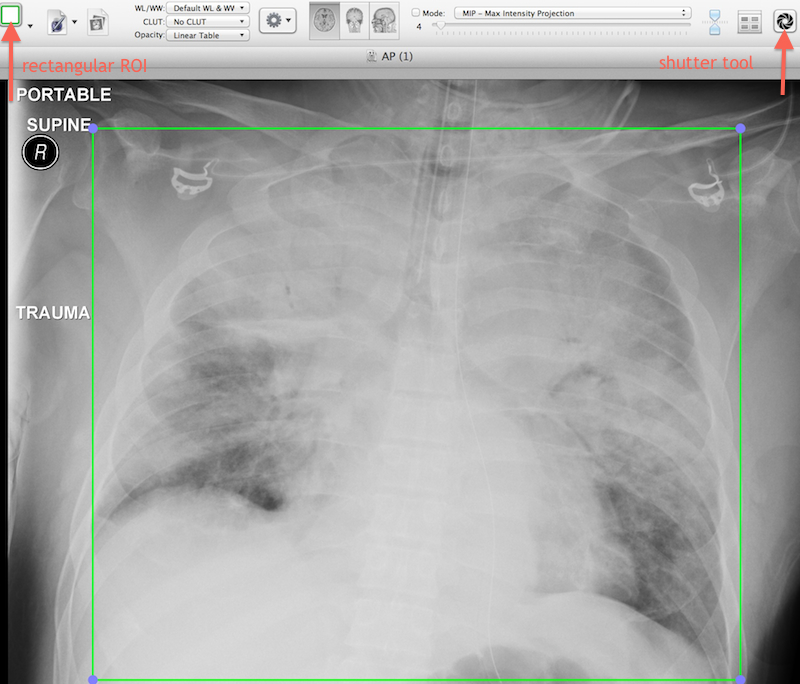
- Define the area to be retained with the
rectangular ROI tool. In the image below, I’m using this technique to exclude extraneous markers from a bedside chest radiographic image. The same process may be used for an ultrasound or nuclear medicine series containing many images. - Click on the Shutter Tool icon in the toolbar. If the icon is not there, right-click on the toolbar, choose
Customize Toolbarand drag it there. - This image demonstrates what you see just before you invoke the Shutter Tool
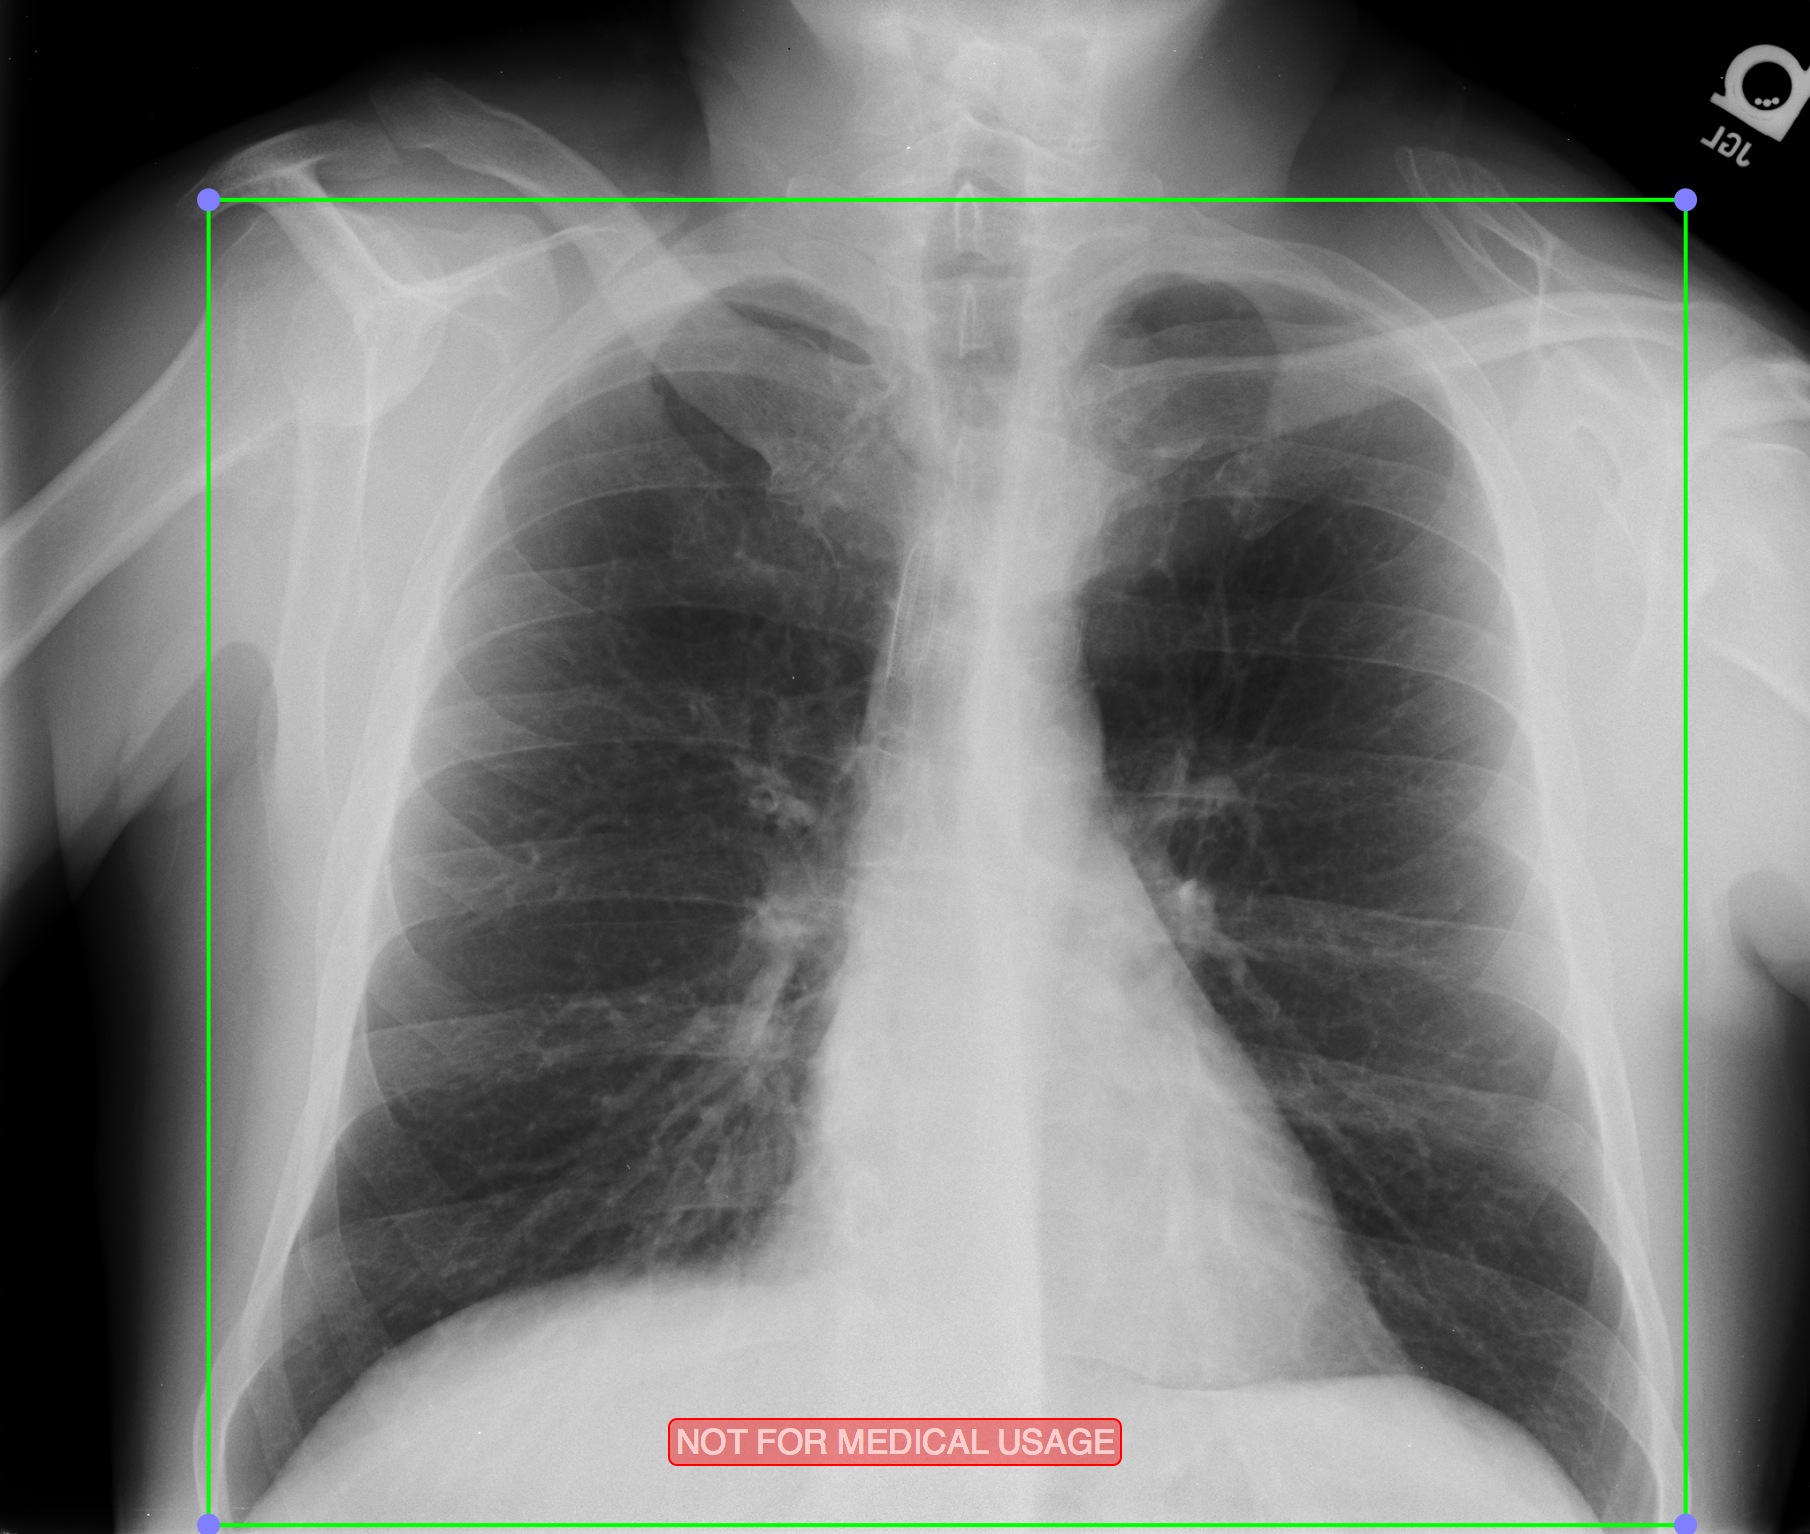
Next steps…
- Now that everything outside the ROI has been removed, use the Zoom and Pan tools to resize and center the resultant image as necessary in the window.
- Hit
Command-Eto save this as a new Series (named as you choose) in the case. For Image Format, specifyas displayed in 16-bit BWbefore clicking OK. - Delete the original series.
If you want to view an excellent video of this process applied to an ultrasound examination, do so right here (Credit: Dr. Mary Roddie, OsiriX U.K. User Group):
If you have a single jpg” alt=“image with embedded personal information that you want to import into an OsiriX case, use the Preview application that comes with every Mac to crop out the information (or blacken it) and then import it into the case with the OsiriX menu item: Plugins...Database...JPEG to DICOM utility, specifying the Meta-data: from the selected study in Database window option when doing so.
Cropping Images
This is generally pertinent to chest radiographs and is the same process described just above.
These images are before and after the use of the Shutter Tool:

Extraneous annotations are easily removed this way.
Specifying Key Images
This is useful in two ways: i.) In OsiriX’s Database Window, one can view a Series consisting of the Key Images by clicking the toolbar icon ROIs and Keys. If the icon is not there, right-click on the Toolbar, choose Customize and put it there; and ii.) These will be displayed separately in the Web Portal as shown below, facilitating preview of a case:
There are two ways to mark Key Images: 1) Depress the command key and double-click on the image, or 2) Right-click and choose Mark as Key image
A yellow frame is displayed around Key Images in the 2-D viewer window.
Creating a Report using Pages and converting it to a DICOM-PDF
The report functionality of OsiriX can be used to provide a summary of the case, within which you provide clinical information about the patient, a chronology of the patient’s clinical course, key images, a description of the key imaging findings, pathology report and other images, such as pathology slides. Because it’s a conventional Pages document, anything can be included. After you have created it, right-click on the case and choose Convert Report to DICOM PDF. Then you don’t need to save the Pages file.
Do the following:
- Specify Pages for Reports at the bottom of OsiriX Preferences: Database
- Navigate to: /Users/[yourname]/Documents/OsiriX Data/PAGES TEMPLATES, duplicate and then modify the
OsiriX Basic Report.pagesas you wish, and then change the names of the other templates there (if any) to something else, so this template will be used as a default. - Invoke the Report as you create a case, check that the templated fields are properly filled-in, and then add content.
My simple Template looks like this:
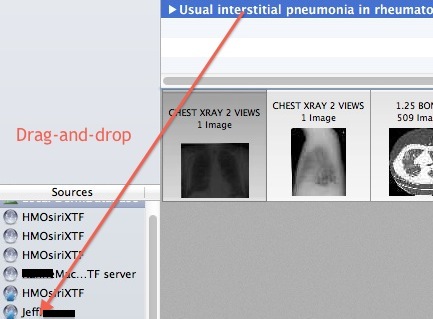
Sending a case to a networked Teaching File Server
Teaching File servers in your network appear in the Sources section of the Albums & Sources sidebar in OsiriX.
To DICOM-send a case to any of them, just drag-and-drop a case on it as follows:
Exporting a case for sharing using a cloud-based server account
Members of our group typically share cases with other members using their individual DropBox ( or similar cloud-based accounts, such as Google Drive or Box) accounts.
Do so as follows:
- Create and label a new folder on your desktop.
- Right-click on a case (or select several cases) and choose
Export to DICOM File(s) - Navigate to and select the folder you created on your Desktop and specify the options shown here:
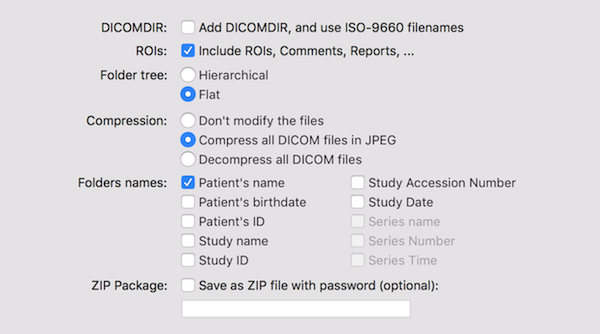
Now drop the folder into your Dropbox and email them a link to download it once it has been uploaded to the Dropbox server.
